- npm : 无法将“npm”项识别为 cmdlet、函数、脚本文件或可
- Flink Table API 与 SQL 编程整理
- springboot、java实现调用企业微信接口向指定用户发送消息
- mysql中去除重复数据,只保留一条。
- 【SpringBoot快速入门】(1)SpringBoot的开发步骤、
- Windows搭建Typecho个人博客并发布公网访问【内网穿透】
- 【MySQL5.7麒麟系统,ARM架构下离线安装,搭建主从集群】
- SpringBoot核心运行原理解析之-------@EnableAu
- Hadoop大数据从入门到实战(二)分布式文件系统HDFS
- 【国产化信创实践】TongWeb集成SpringBoot
- Python甘肃兰州二手房源爬虫数据可视化分析大屏全屏系统 开题报告
- 客户端Unexpected end of file from serv
- 【MySQL】使用 IN 或 NOT IN,数据中有 NULL 出现的
- SpringBoot 的版本、打包、Maven
- MyBatis:动态 SQL 标签
- Mysql字符串截取
- Host is not allowed to connect to t
- Spring Boot动态设置定时任务
- Python山西太原二手房源爬虫数据可视化分析大屏全屏系统 开题报告
- PLsql---Oracle 下载安装详解
- 【MySQL】一文带你了解MySQL中的子查询
- 基于Java+Swing+mysql实现图书借阅管理系统--期末大作业
- pom文件中,mysql依赖报错:mysql:mysql-connec
- Azure Machine Learning - 如何使用 GPT-4
- MySQL 中的 UNION 语句
- 【Java】Spring MVC程序开发
- MS SQL Server 查看存储过程
- 【Golang】排查 Build constraints exclud
- 【爬虫实战】用python爬豆瓣电影《热烈》的短评!
- 【Spring Security】让你的项目更加安全的框架

一、工具介绍
Prometheus: 普罗米修斯可以简单理解为一个监控工具,以时间为单位展示指定数据维度的变化 趋势。
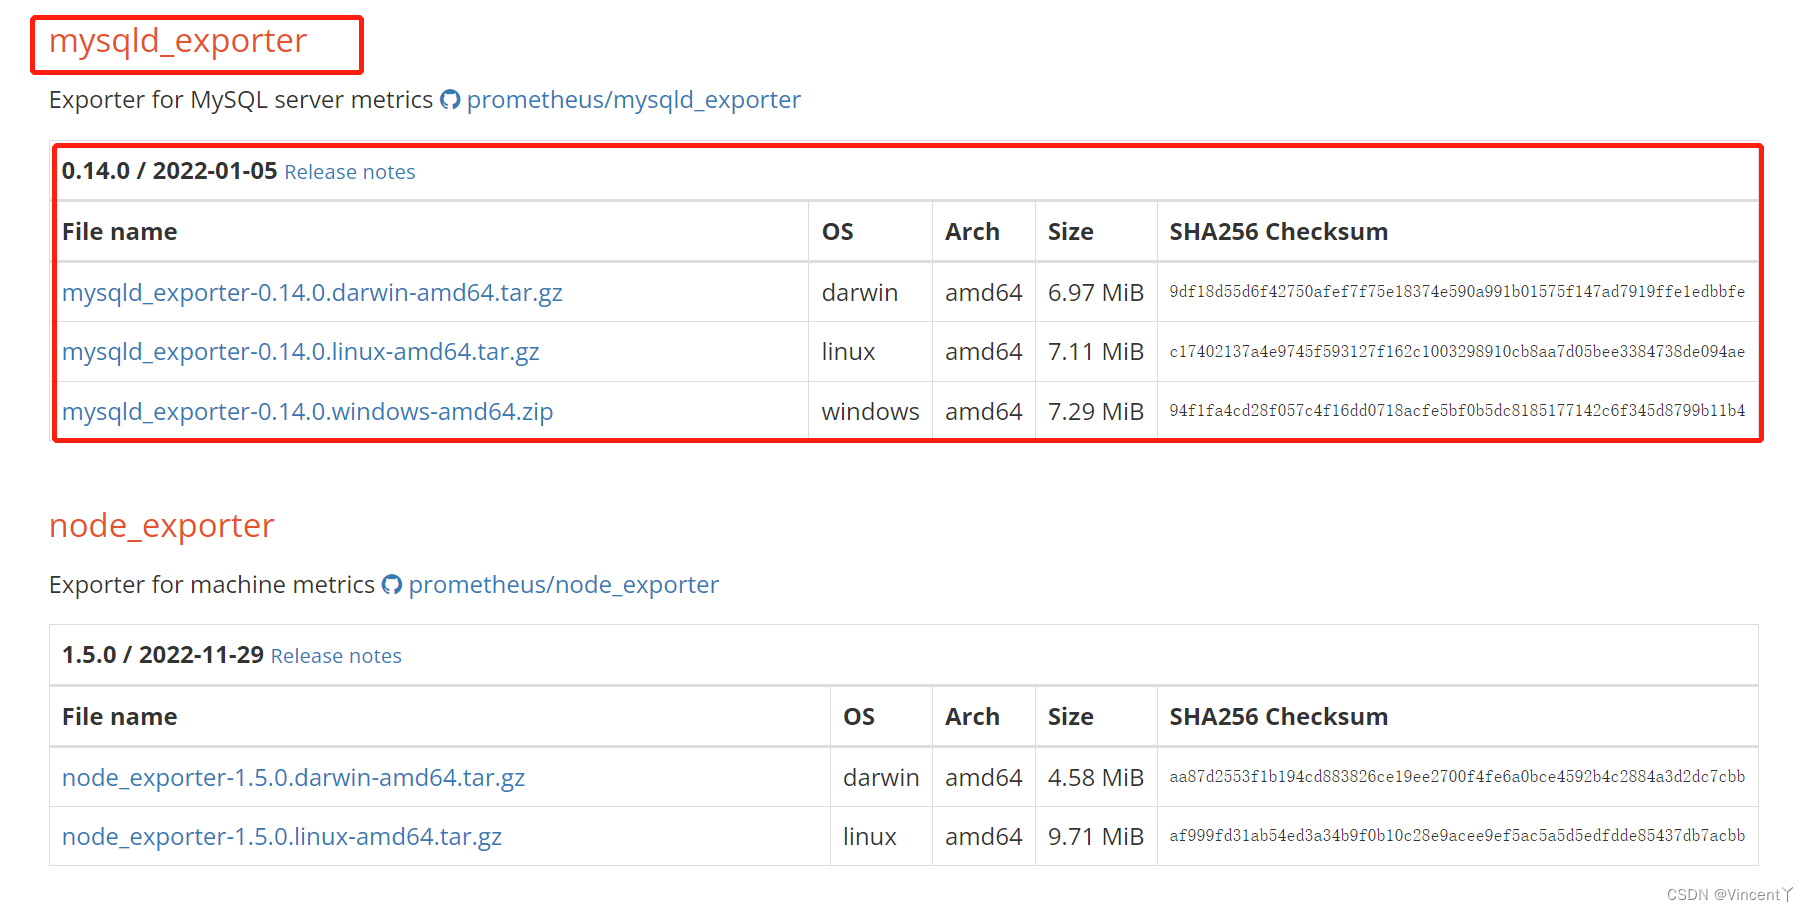
mysqld_exporter :主要是依赖数据采集器,对于mysql数据采集使用的是mysqld_exporter。
Grafana: 主要用于可视化展示的监控软件,让数据监控更直观,支持多种仪表盘类型,就好比经 常见的数据大屏,仪表盘就是各种展示形式。
二、工具下载
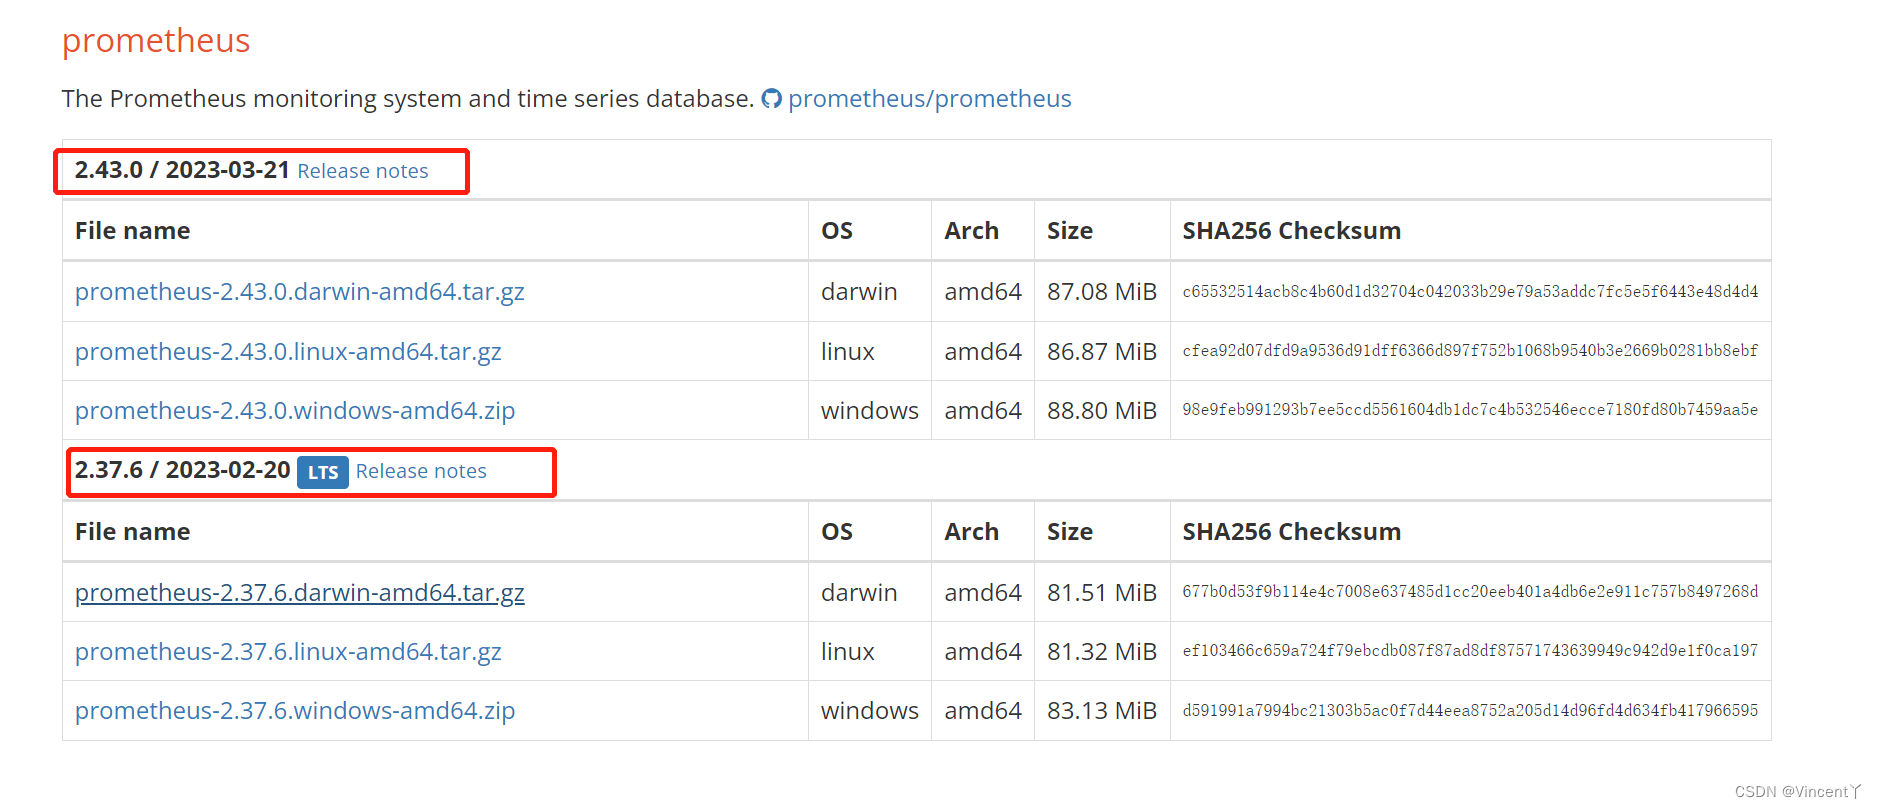
prometheus--普罗米修斯
Download | Prometheus
mysql_exporter : Download | Prometheus
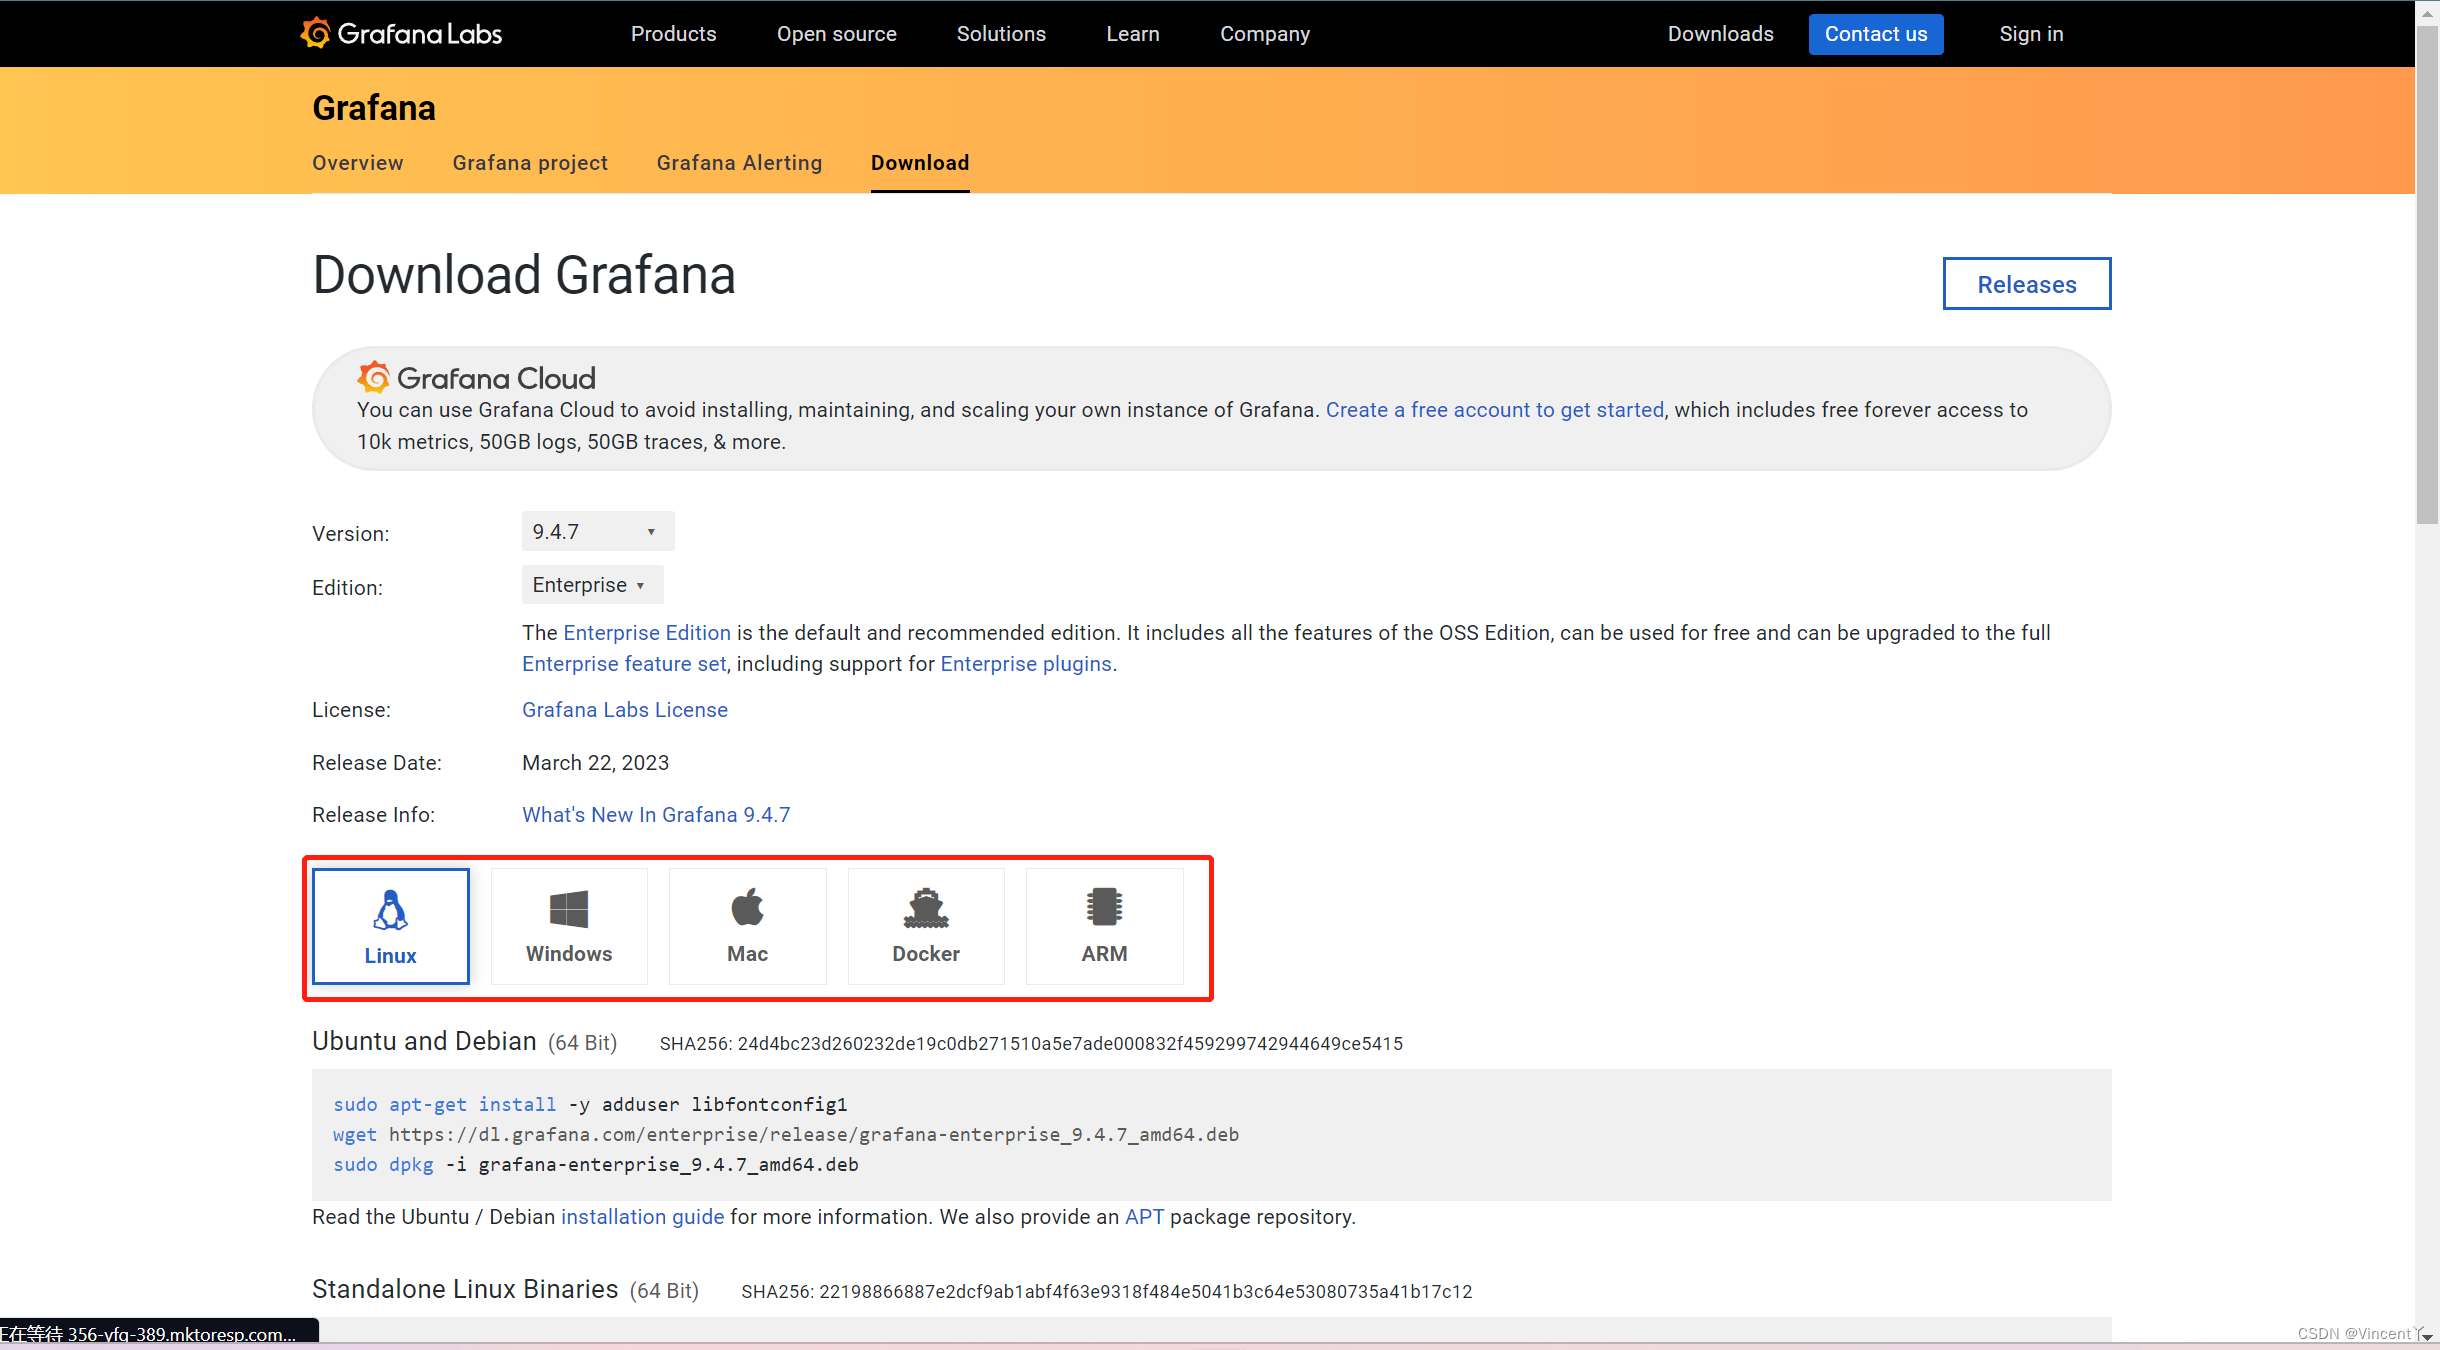
Grafana --格拉法纳
Download Grafana | Grafana Labs
格拉法纳
三、安装
1、安装 mysqld_exporter-0.14.0.windows-amd64.zip (windows版)
1.1 解压
1.2 创建my.cnf文件
1.3 在my.cnf文件中进行配置
修改你对应的属性值,
[client]
# mysql用户名
user=root
#mysql的密码
password=root
#主机地址
host=localhost
# mysql端口号
prot=3306
1-1 mysqld_exporter-0.14.0.linux-amd64.tar.gz (Linux版)
1-1.1 将下载好的压缩包 mysqld_exporter-0.14.0.linux-amd64.tar.gz,放到linux中自己自定义文件夹下
# 解压
tar -zxvf mysqld_exporter-0.14.0.linux-amd64.tar.gz
# 重命名
mv mysqld_exporter-0.14.0.linux-amd64.tar.gz/ mysqld_exporter
# 删除压缩包
rm -f mysqld_exporter-0.14.0.linux-amd64.tar.gz
1-1.2 在压缩好的文件夹mysqld_exporter下新建my.cnf,将下面代码写进my.cnf中
cd mysqld_exporter
# 编辑my.cnf
vi my.cnf
[client]
user=mysql_test # 创建的用户名
password=123456 # 密码
1-1.3 进入mysql中,创建和文件中相同的用户
mysql -uroot -p123456 # 使用root进去创建
CREATE USER 'mysql_test'@'localhost' IDENTIFIED BY '123456' WITH MAX_USER_CONNECTIONS 3;
GRANT PROCESS, REPLICATION CLIENT, SELECT ON *.* TO 'mysql_test'@'localhost';
FLUSH PRIVILEGES;
EXIT;
使用mysql -umysql_test -p123456登录测试,是否创建成功
1-1.4 手动启动mysqld-exporter
# 执行mysql_exporter,后面是全路径
./mysqld_exporter --config.my-cnf=/data/mysqld_exporter/my.cnf

自启动mysqld-exporter,创建服务文件
# 创建服务文件,将下面代码写入
vim /usr/lib/systemd/system/mysqld_exporter.service

# 注意修改文件路径
[Unit]
Description=mysql Monitoring SystemDocumentation=mysql Monitoring System
[Service]
ExecStart=/data/mysqld_exporter/mysqld_exporter \
--collect.info_schema.processlist \
--collect.info_schema.innodb_tablespaces \
--collect.info_schema.innodb_metrics \
--collect.perf_schema.tableiowaits \
--collect.perf_schema.indexiowaits \
--collect.perf_schema.tablelocks \
--collect.engine_innodb_status \
--collect.perf_schema.file_events \
--collect.binlog_size \
--collect.info_schema.clientstats \
--collect.perf_schema.eventswaits \
--config.my-cnf=/data/mysqld_exporter/my.cnf
[Install]
WantedBy=multi-user.target
启动服务
# 启动服务
systemctl start mysqld_exporter.service
# 设置自启动
systemctl enable mysqld_exporter.service
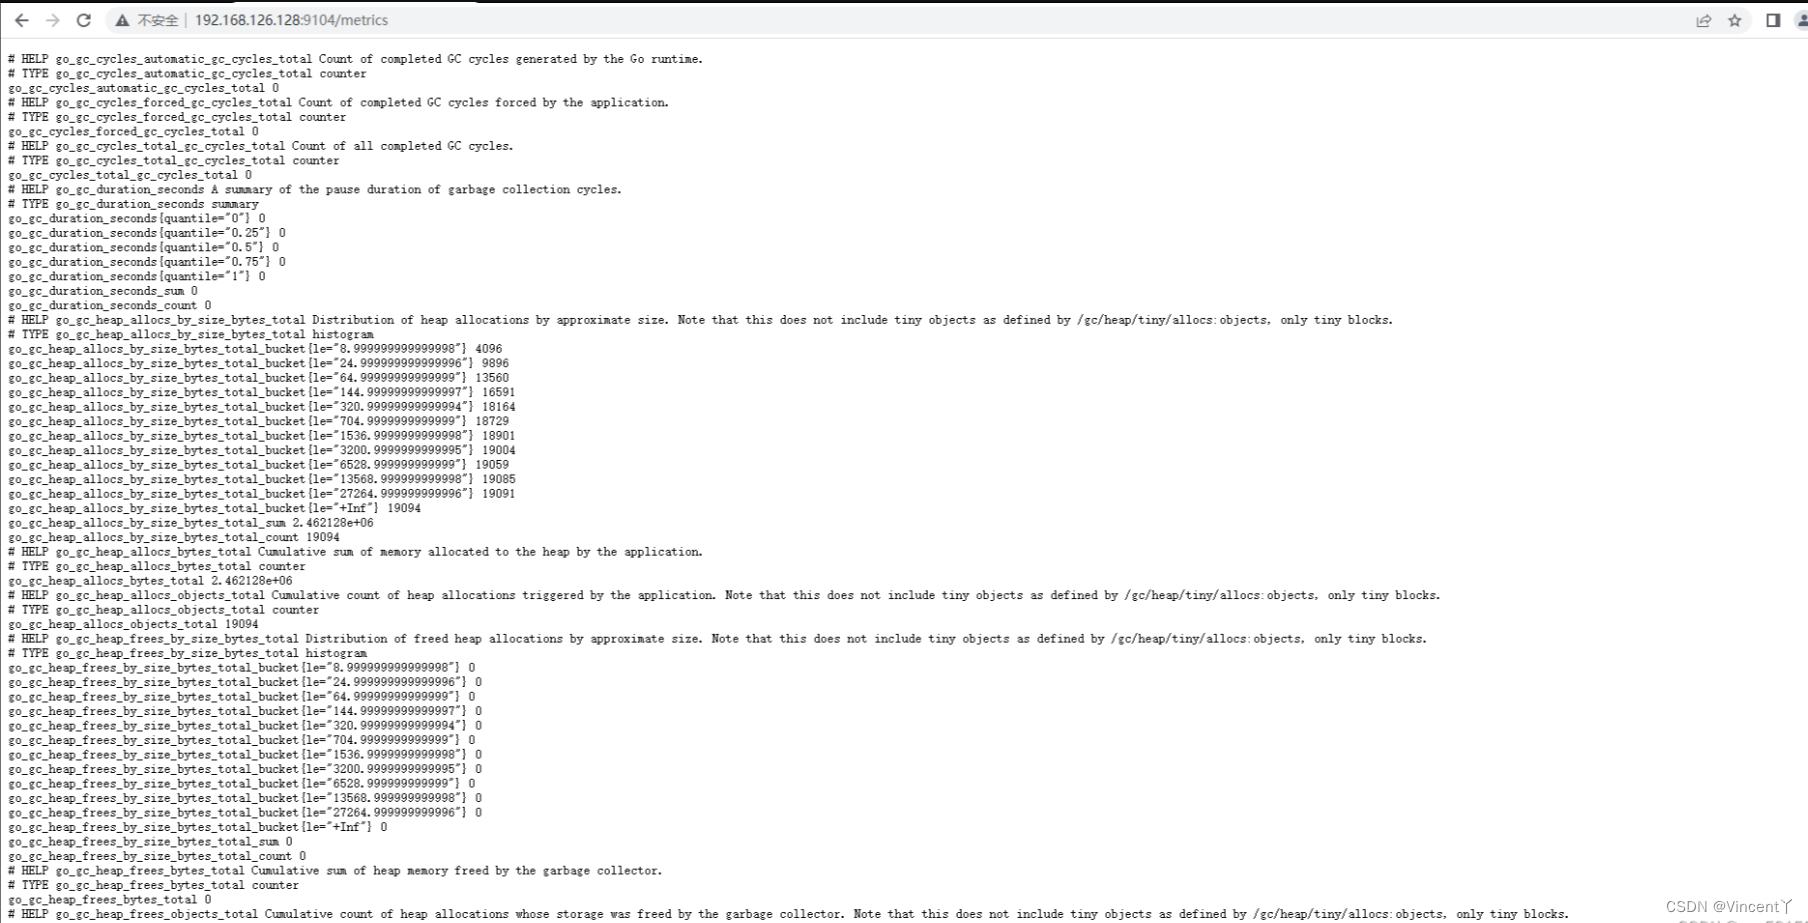
2、安装 prometheus 普罗米修斯
2.1 解压安装包
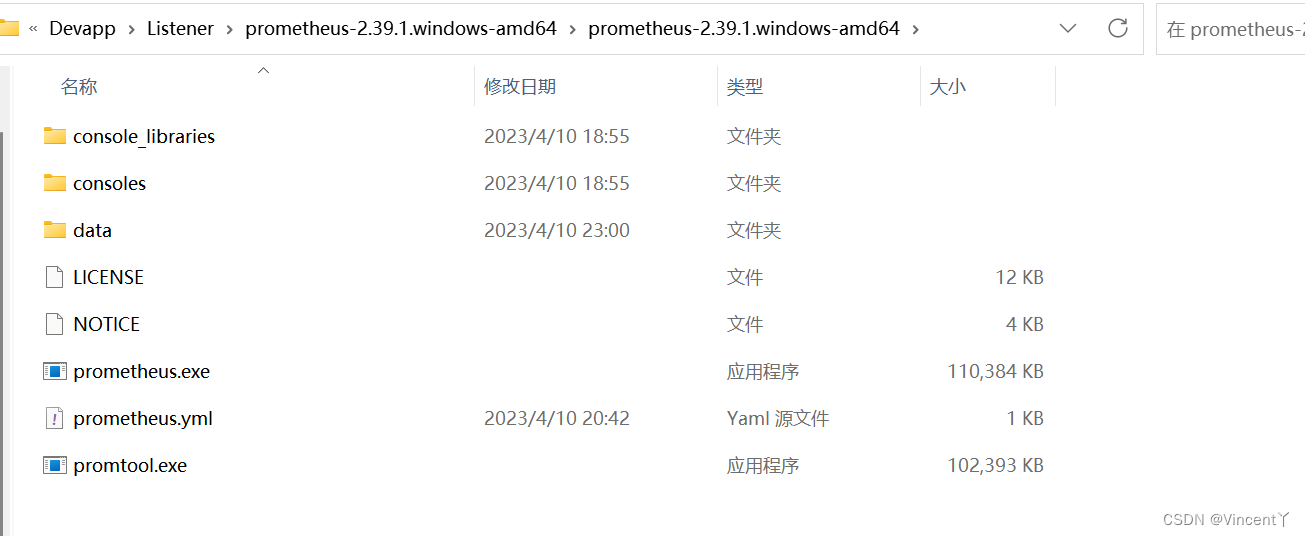
2.2 修改配置文件 prometheus.yml的 scrape_configs:
scrape_configs:
  # The job name is added as a label `job=` to any timeseries scraped from this config.
  #Mysql服务器监控
  - job_name: "mysql"
    # metrics_path defaults to '/metrics'
    # scheme defaults to 'http'.

    static_configs:
      - targets: ["localhost:9104"] #ip地址+端口
2.3 双击启动 prometheus
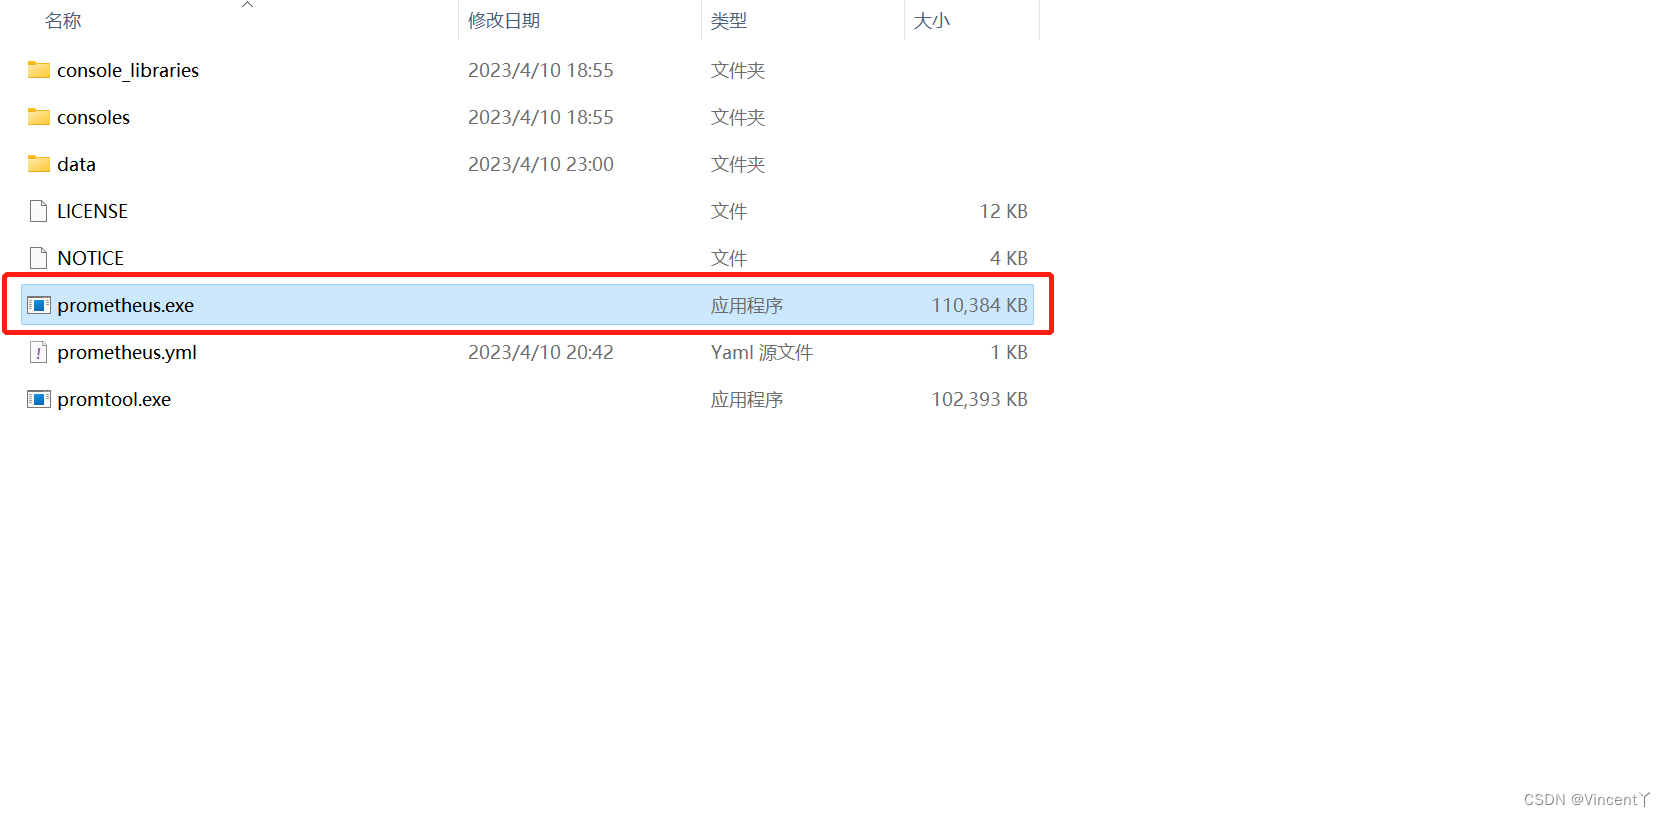
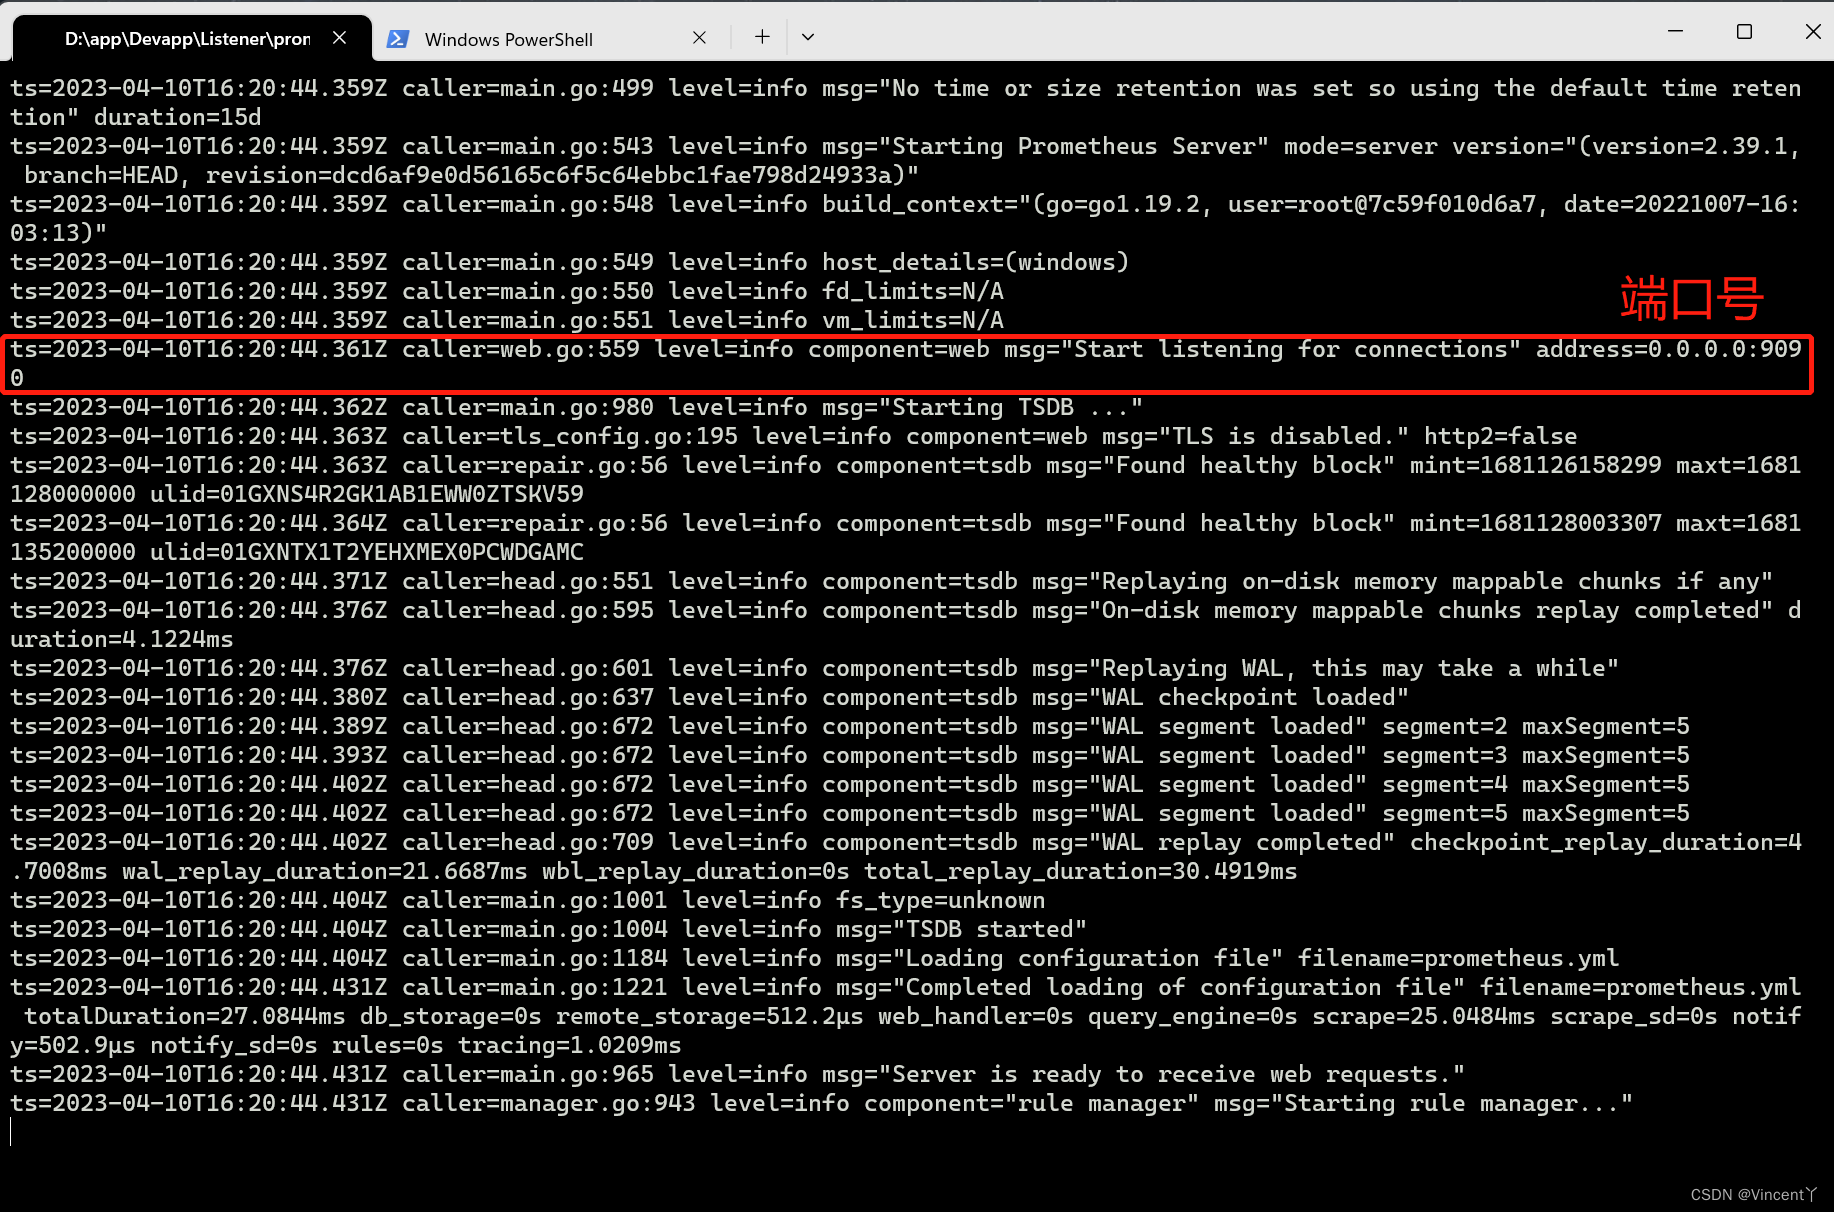
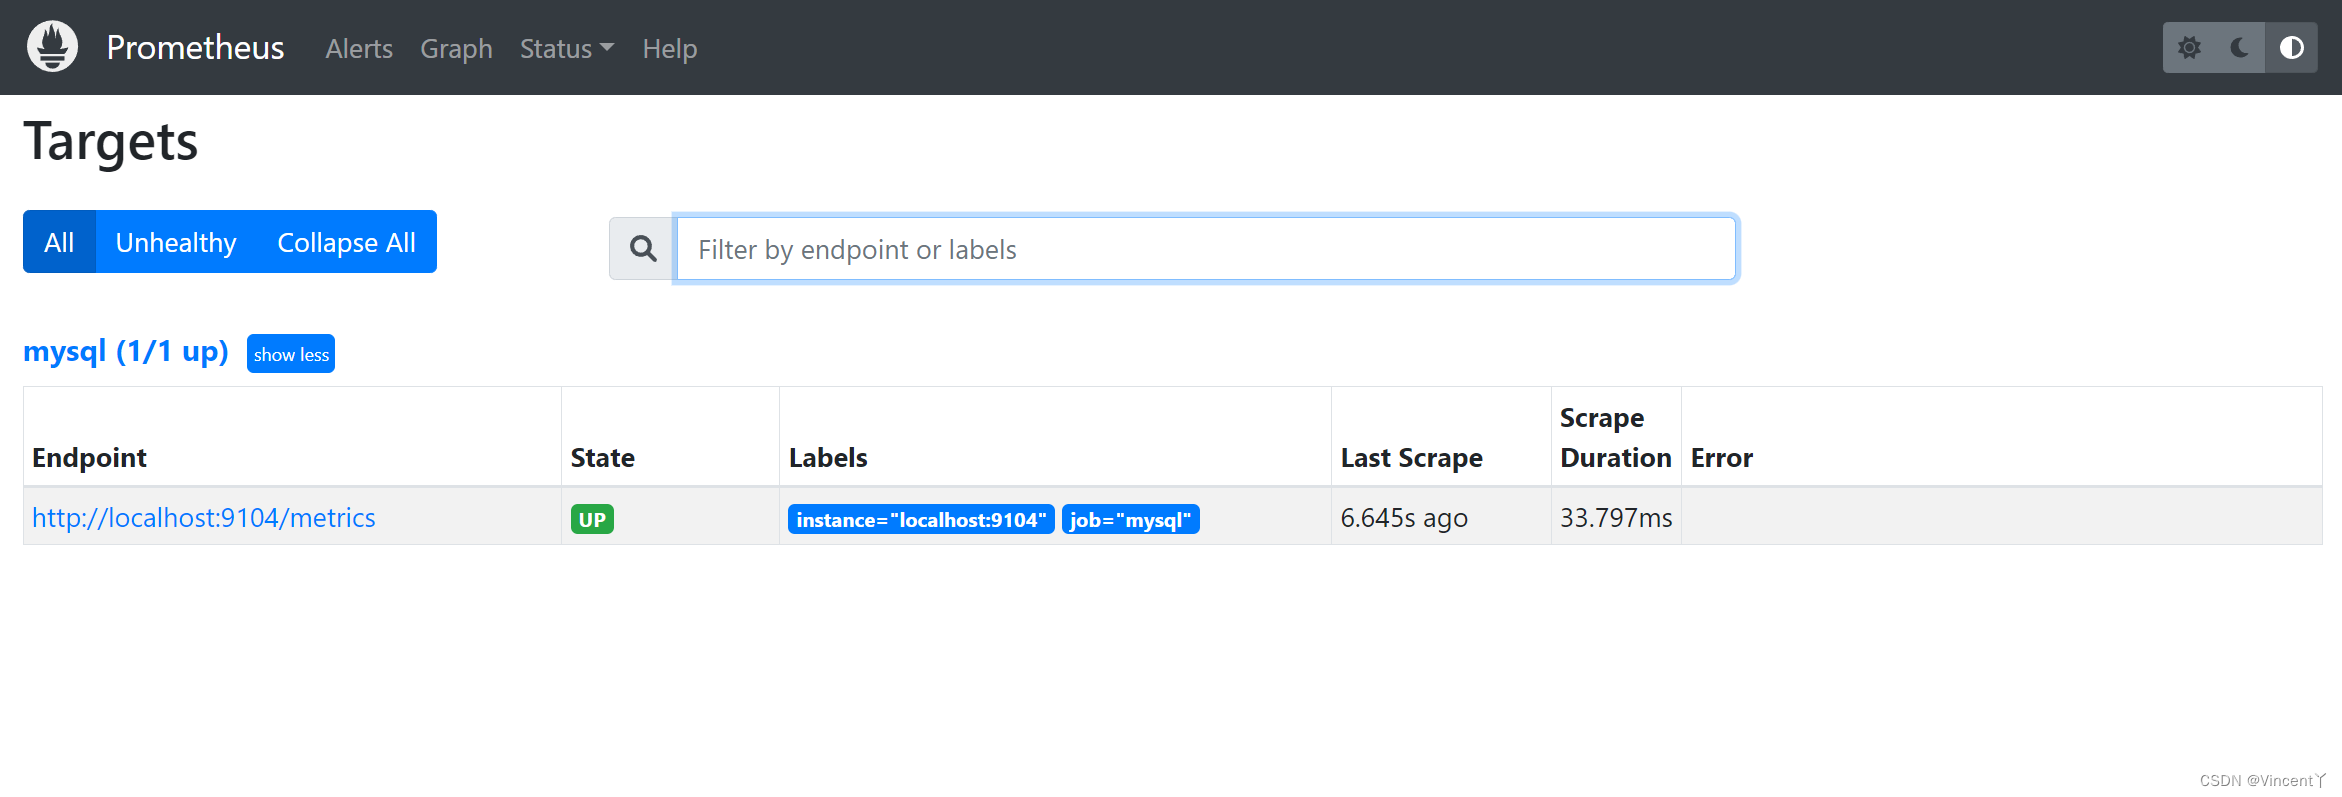
启动成功后,用浏览器打开http://localhost:9090,出现如下界面安装成功
3、安装Grafana,双击下好的 grafana-enterprise-9.2.5.windows-amd64.msi
3.1 一路下一步安装
无脑安装法,一路next(其中可自己配置安装路径,尽量不要装在C盘)
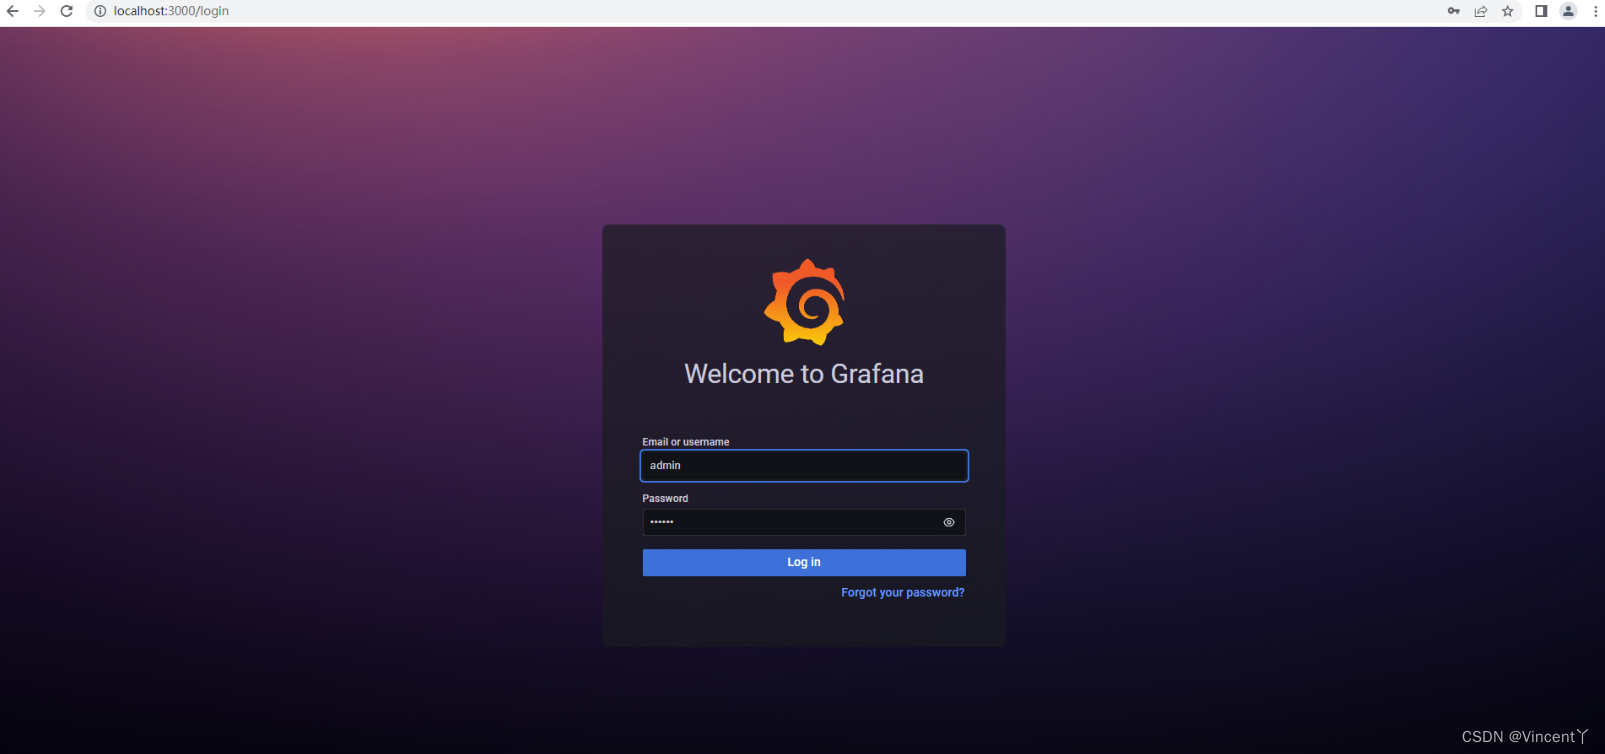
3.2 安装完成之后,浏览器输入http://localhost:3000
如下图,默认用户名密码 admin/admin
四、3个工具的进行数据监听、采集、可视化展示配置
到此为止三个东西都已安装完成,接下来开始监控。回到prometheus页面,通过Status下拉框找到Targets,点进去,up 表示正常监听
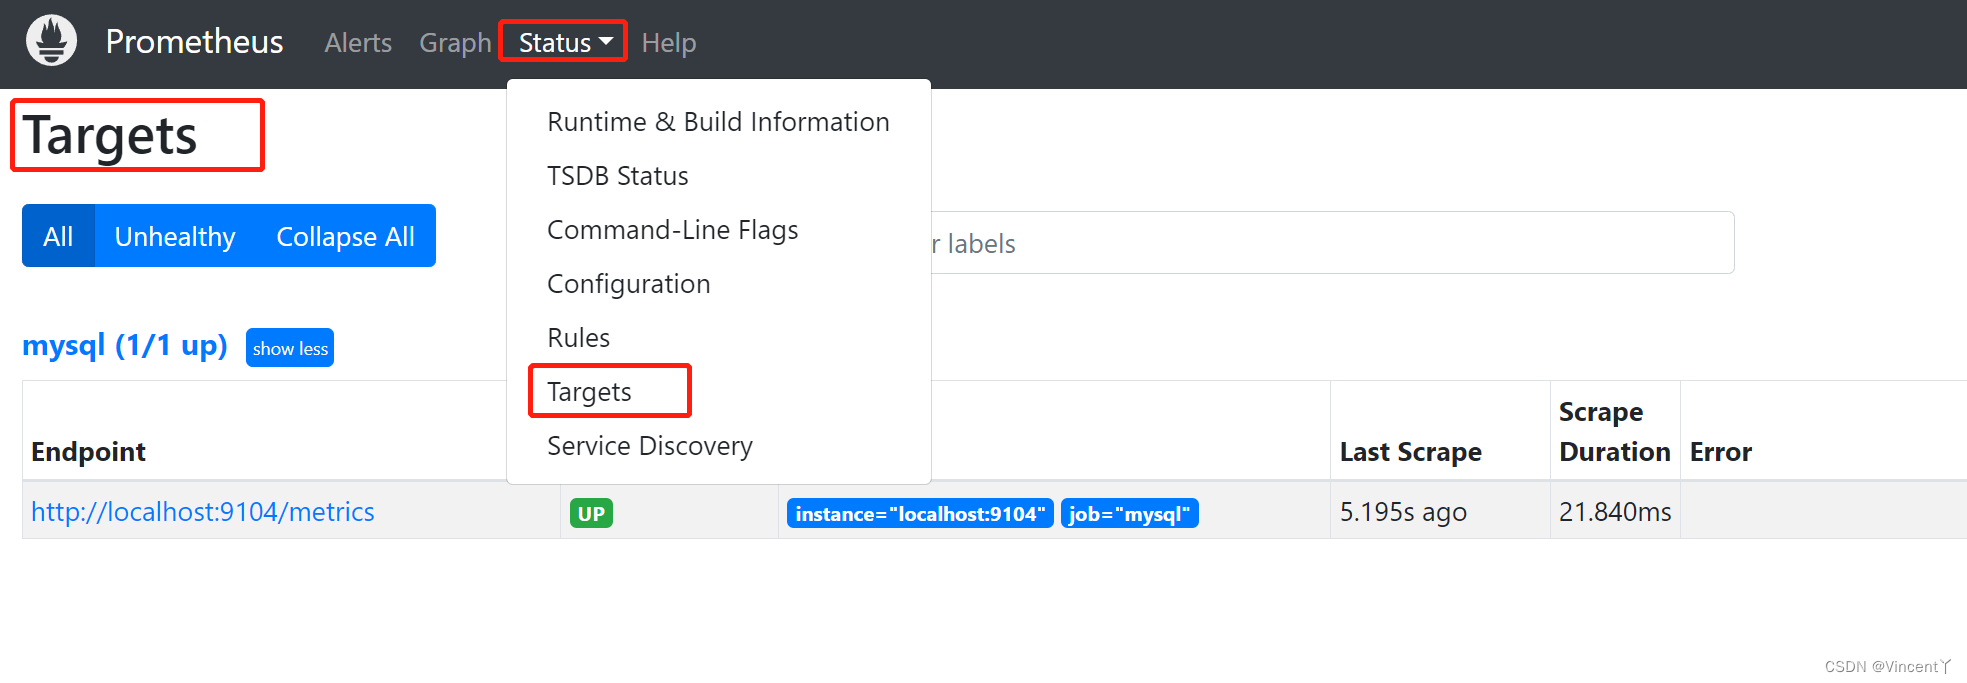
state显示绿色的UP就说明已成功监听,再去Grafana界面
1、点击左侧边栏的设置项Configuration
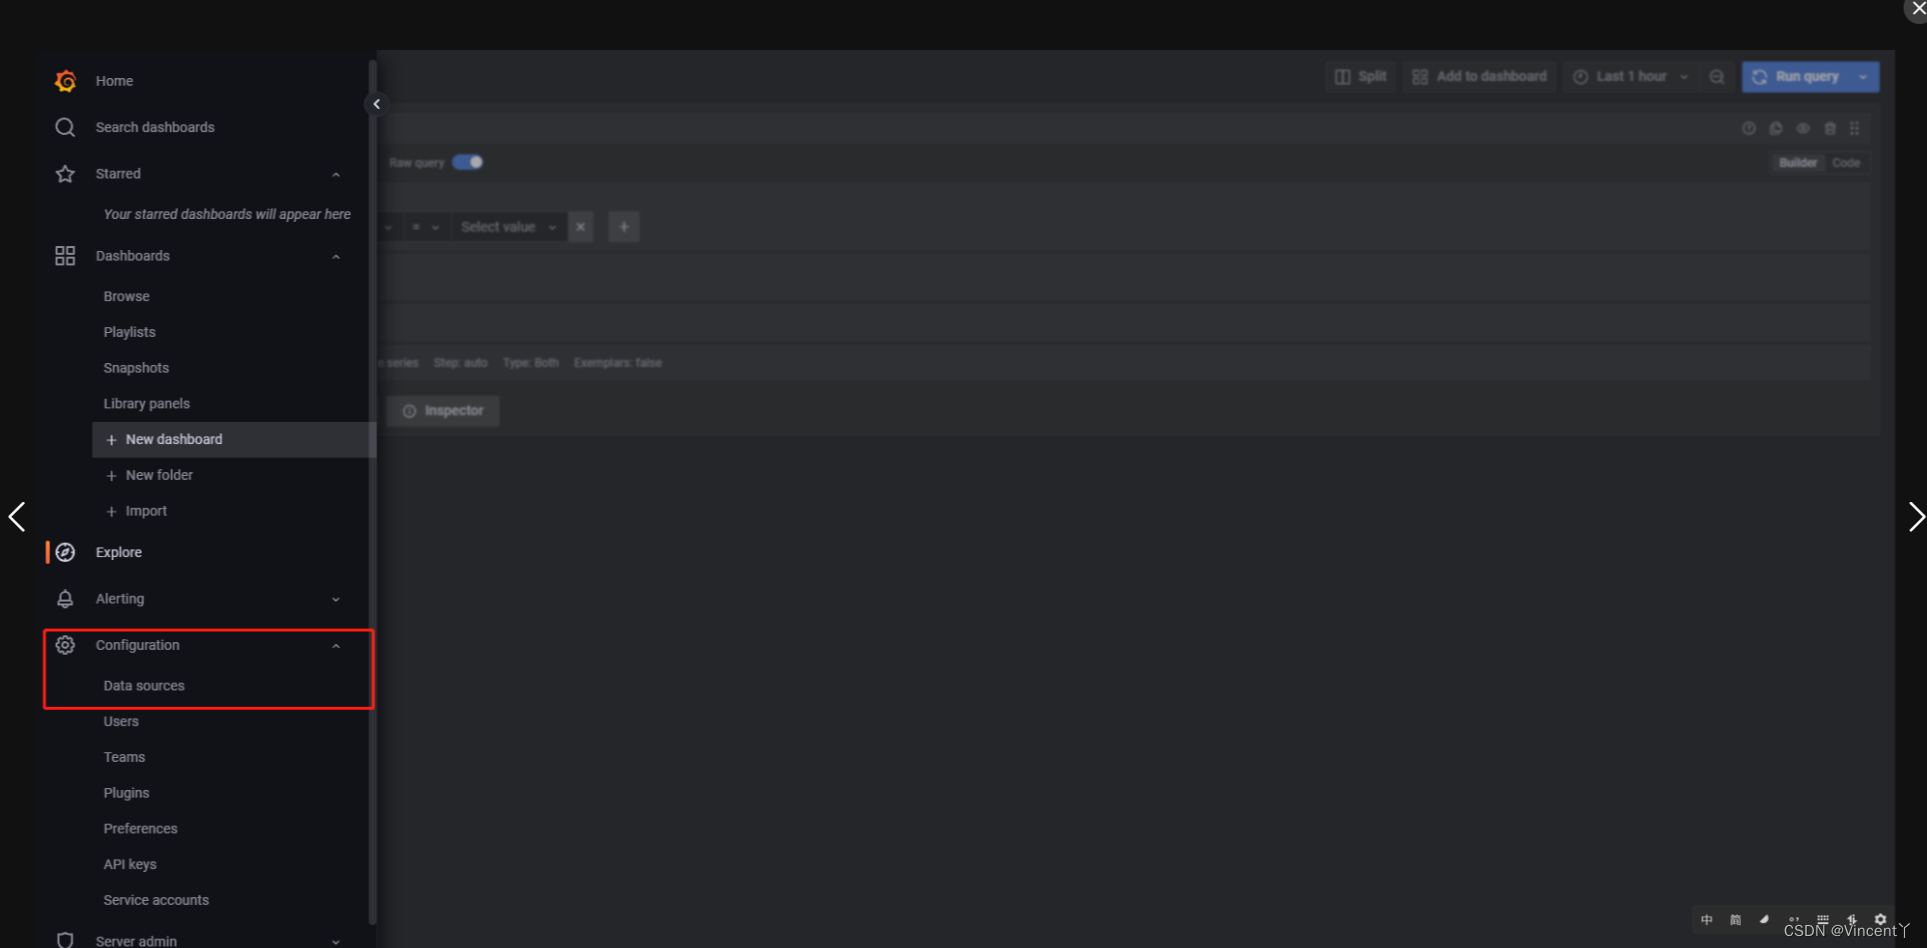
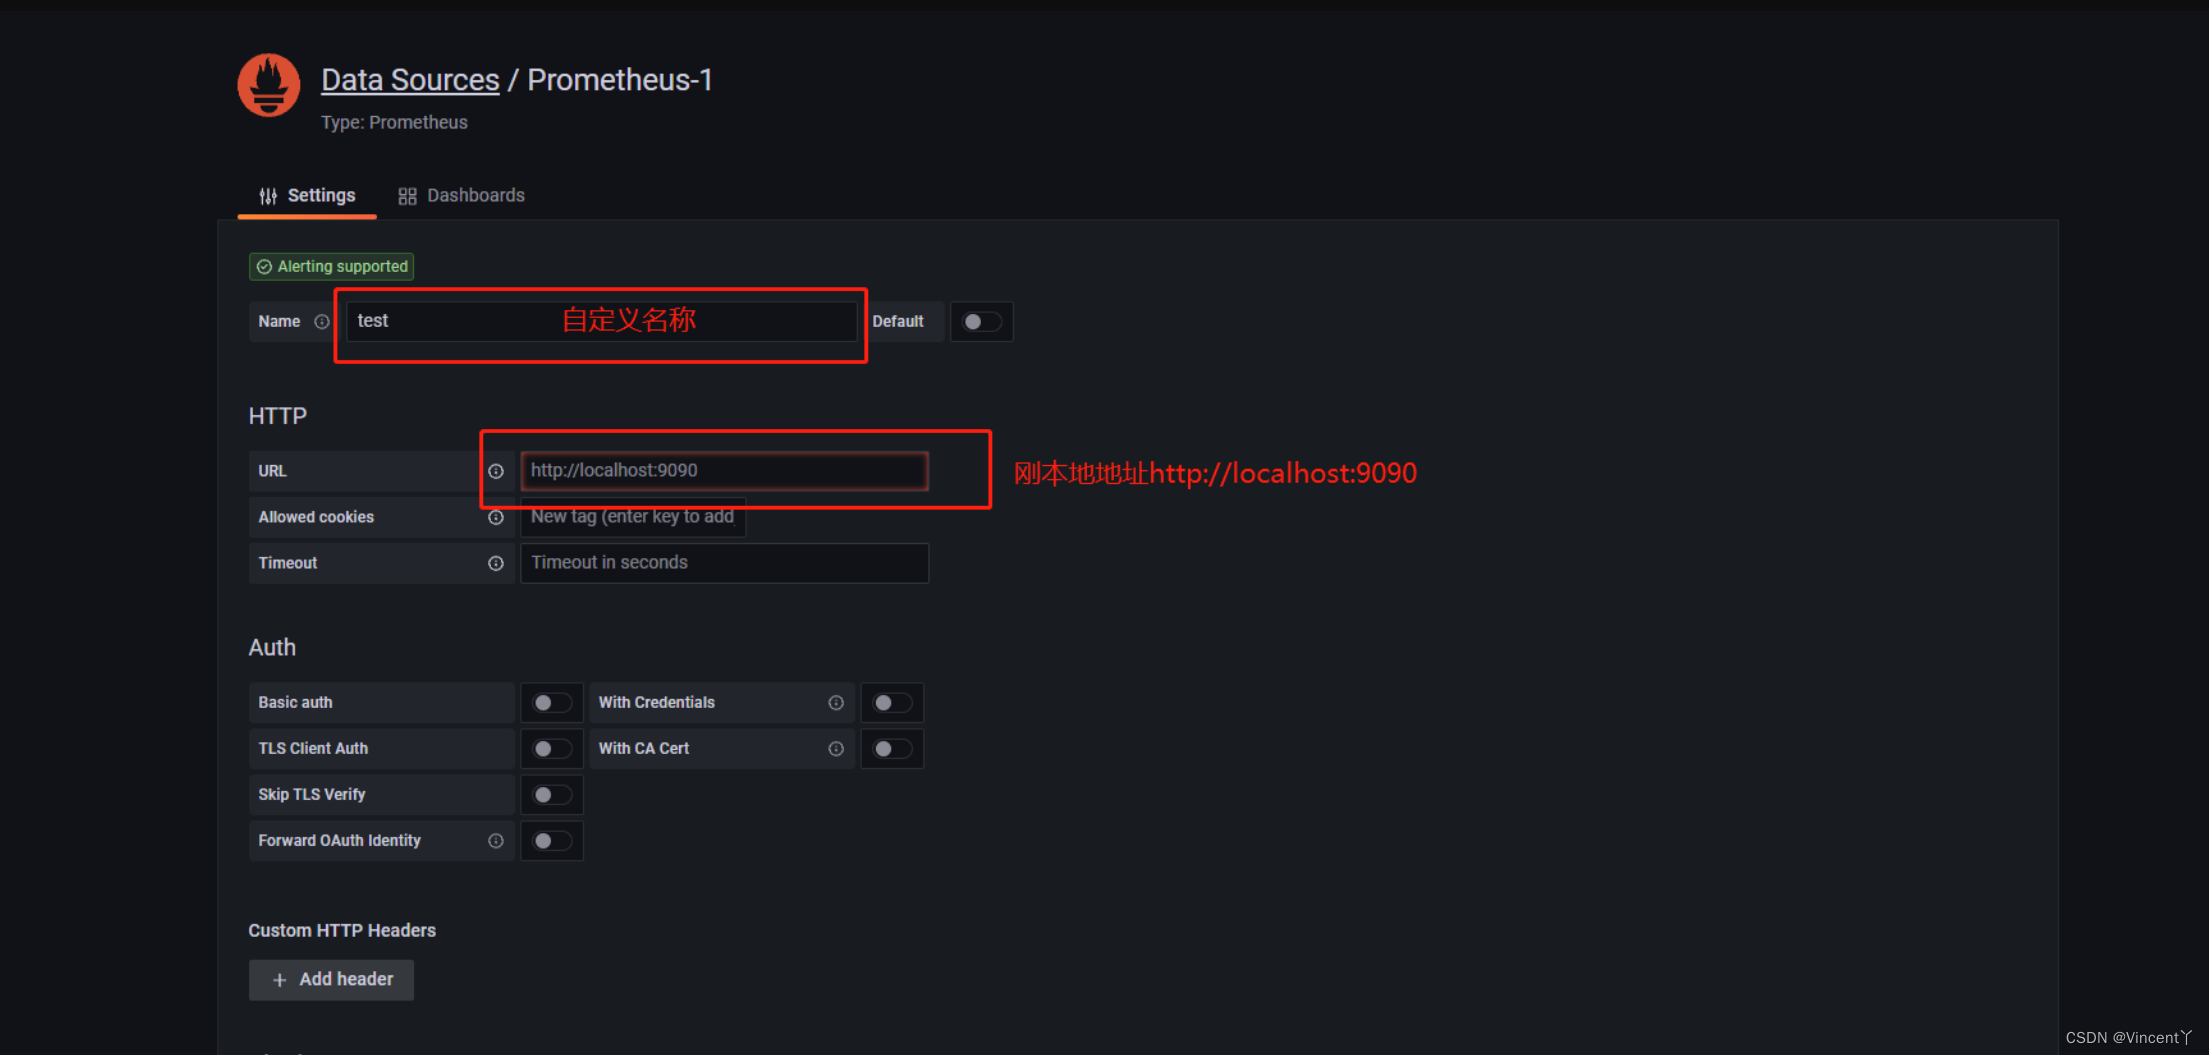
2、找到Data sources,点进去设置数据源为prometheus

3、设置名称和本地地址 http://local host:9090
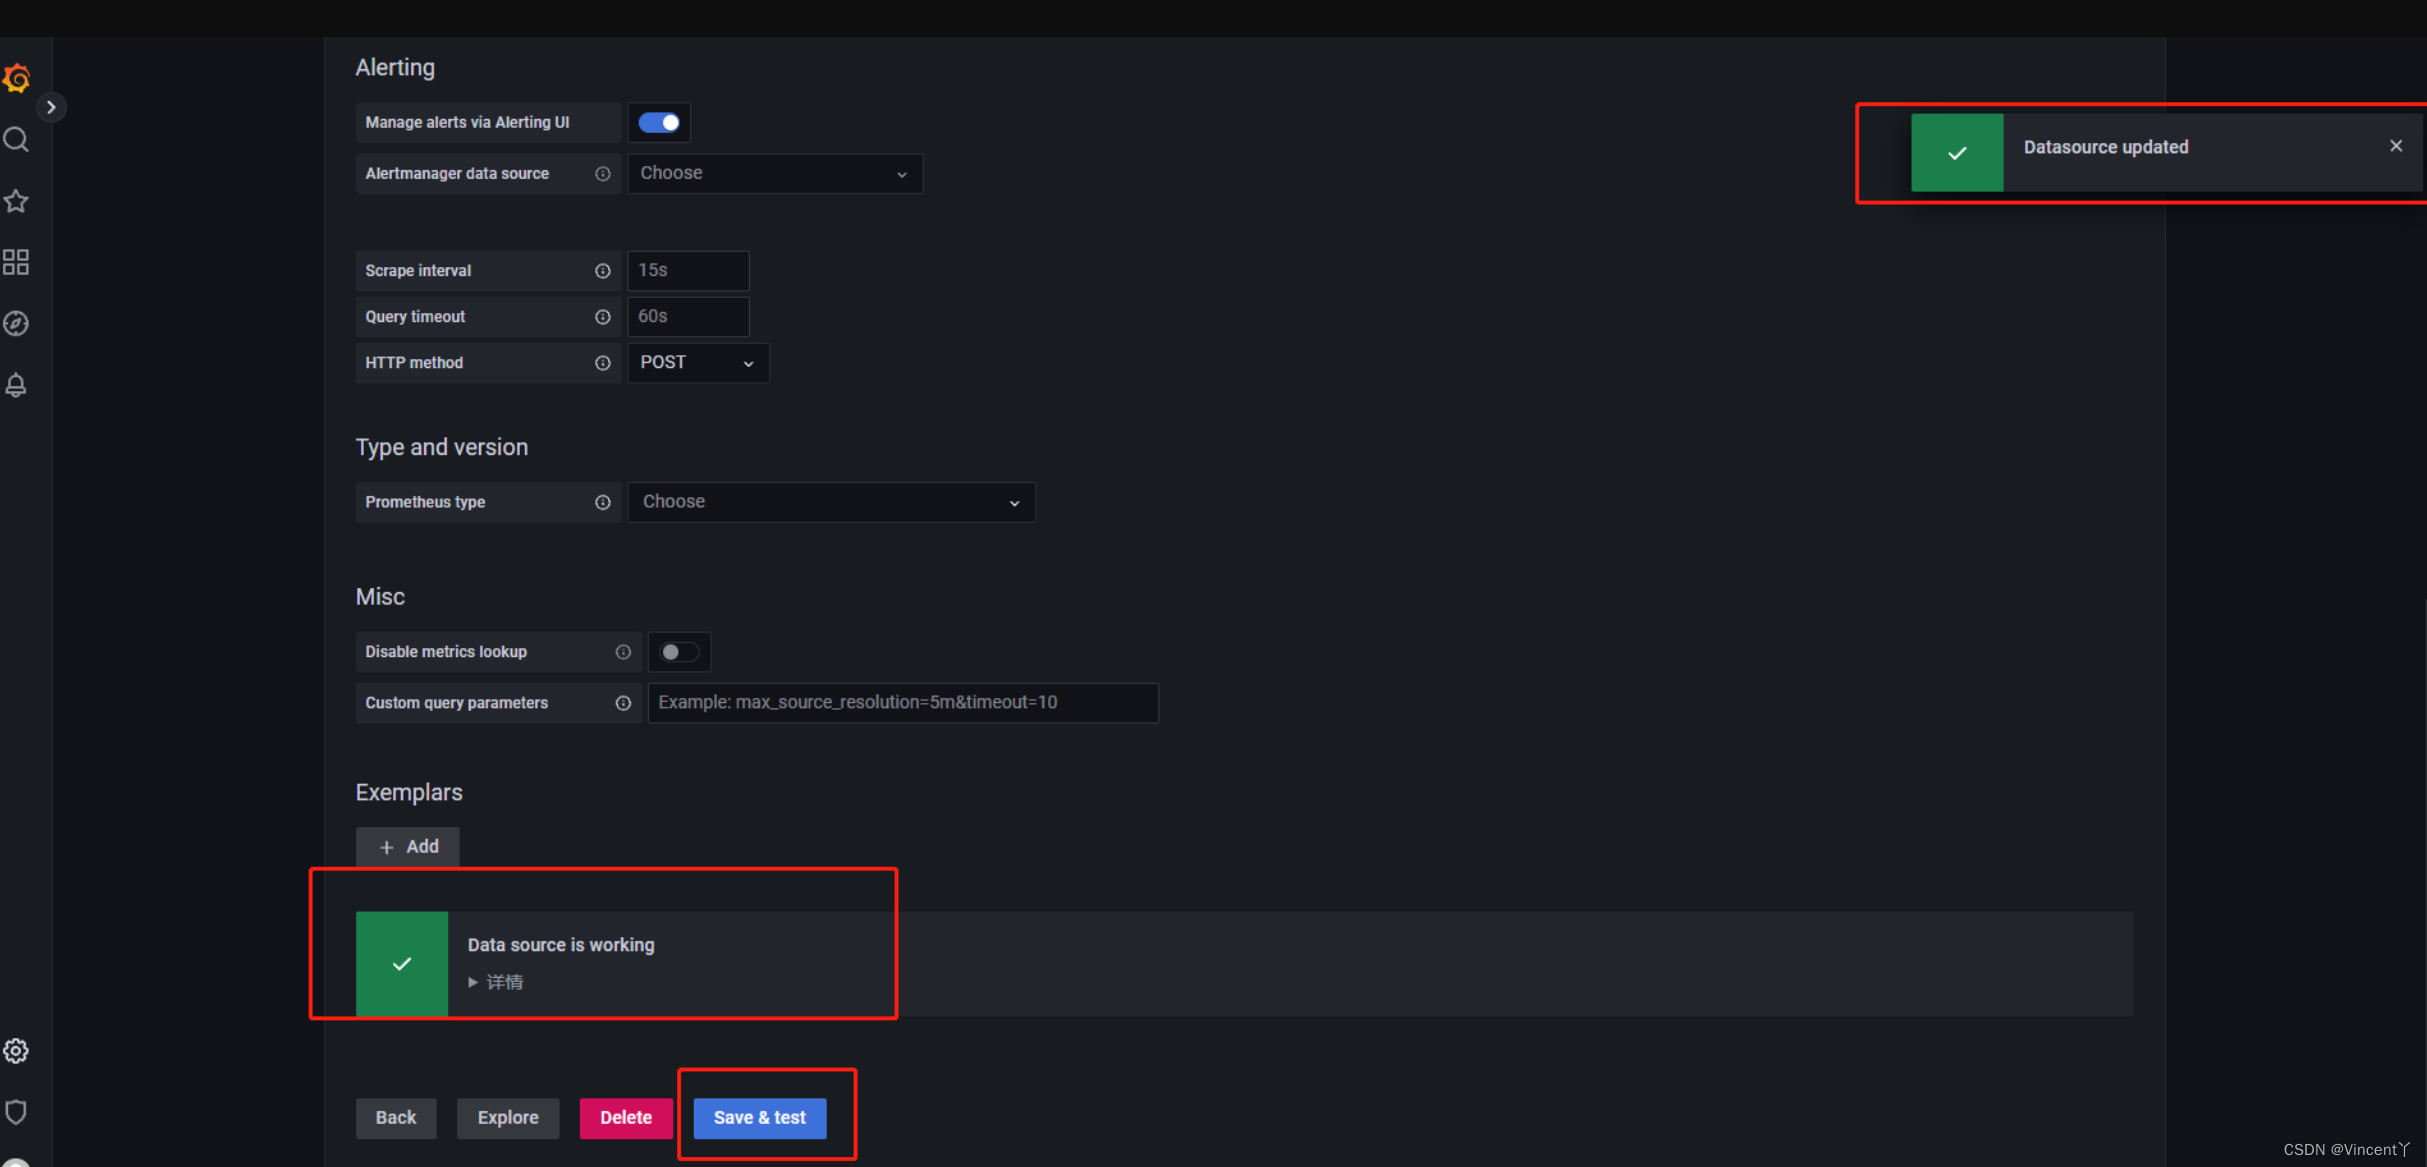
4、点击Save&test
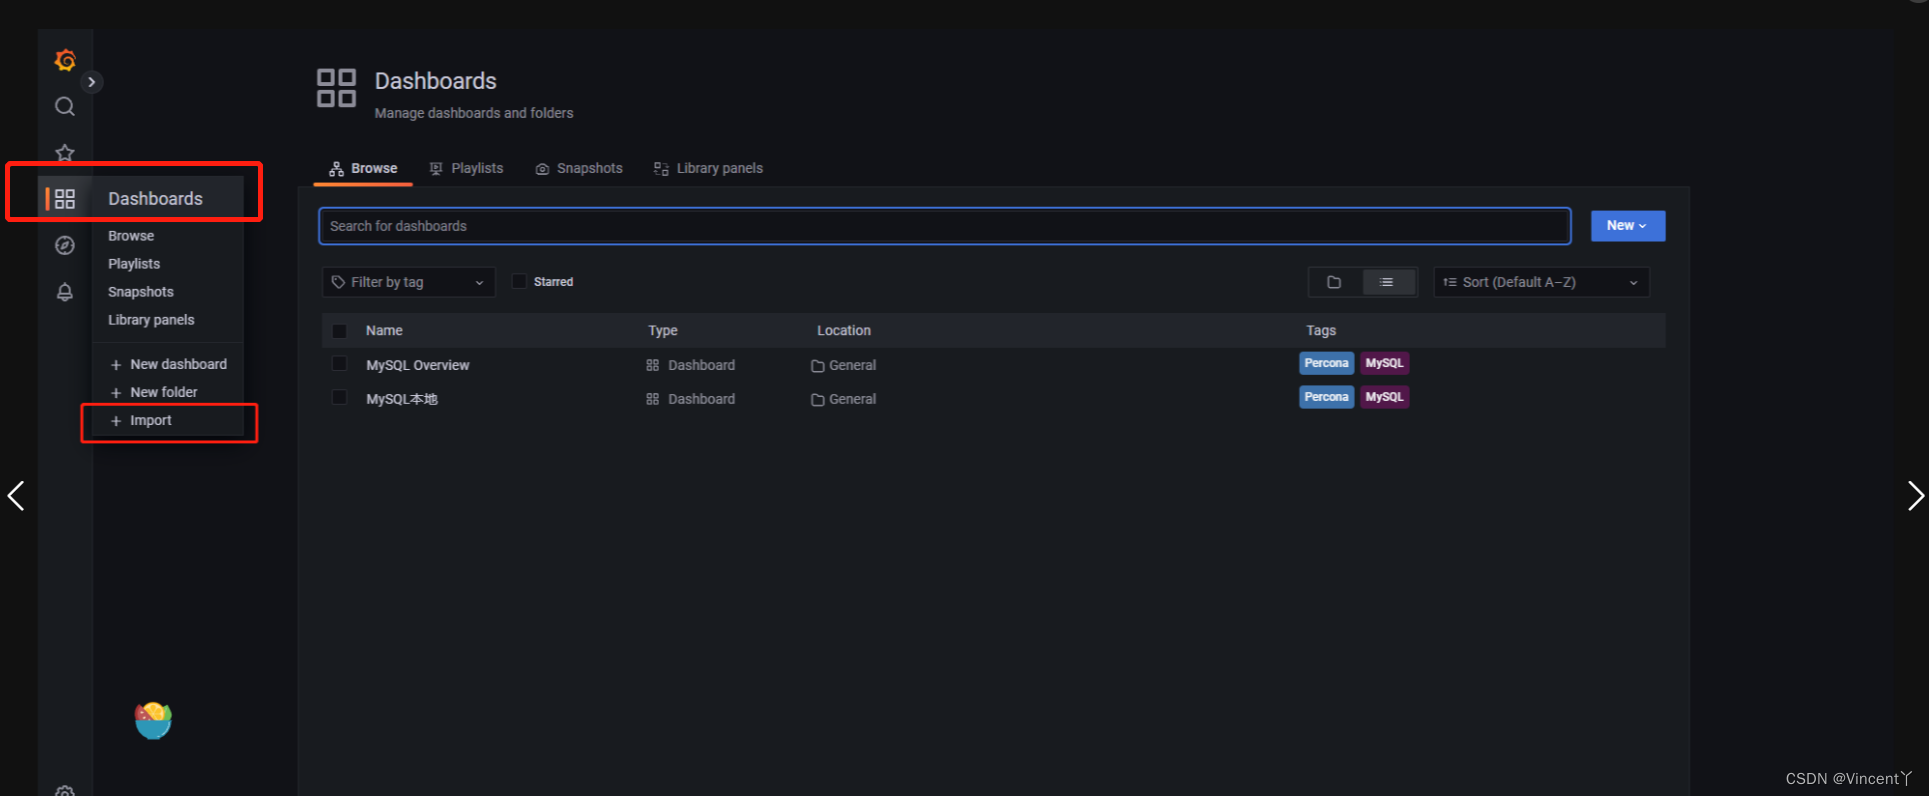
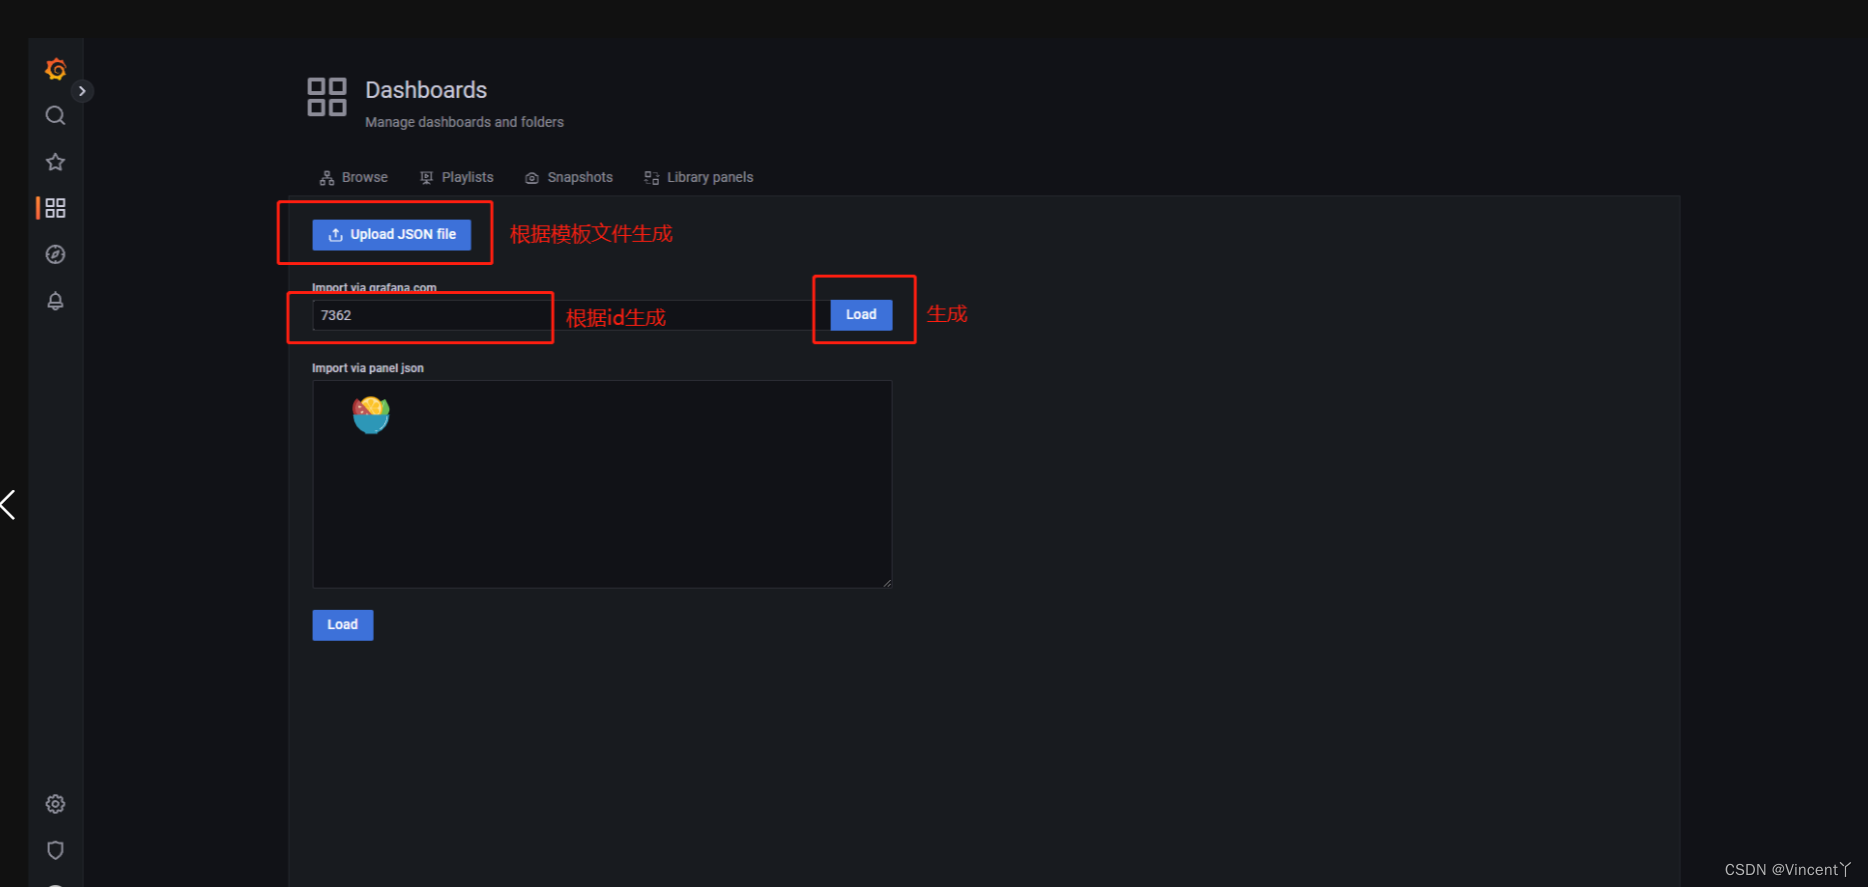
5、创建Dashboards ,点击Dashboards-->Import
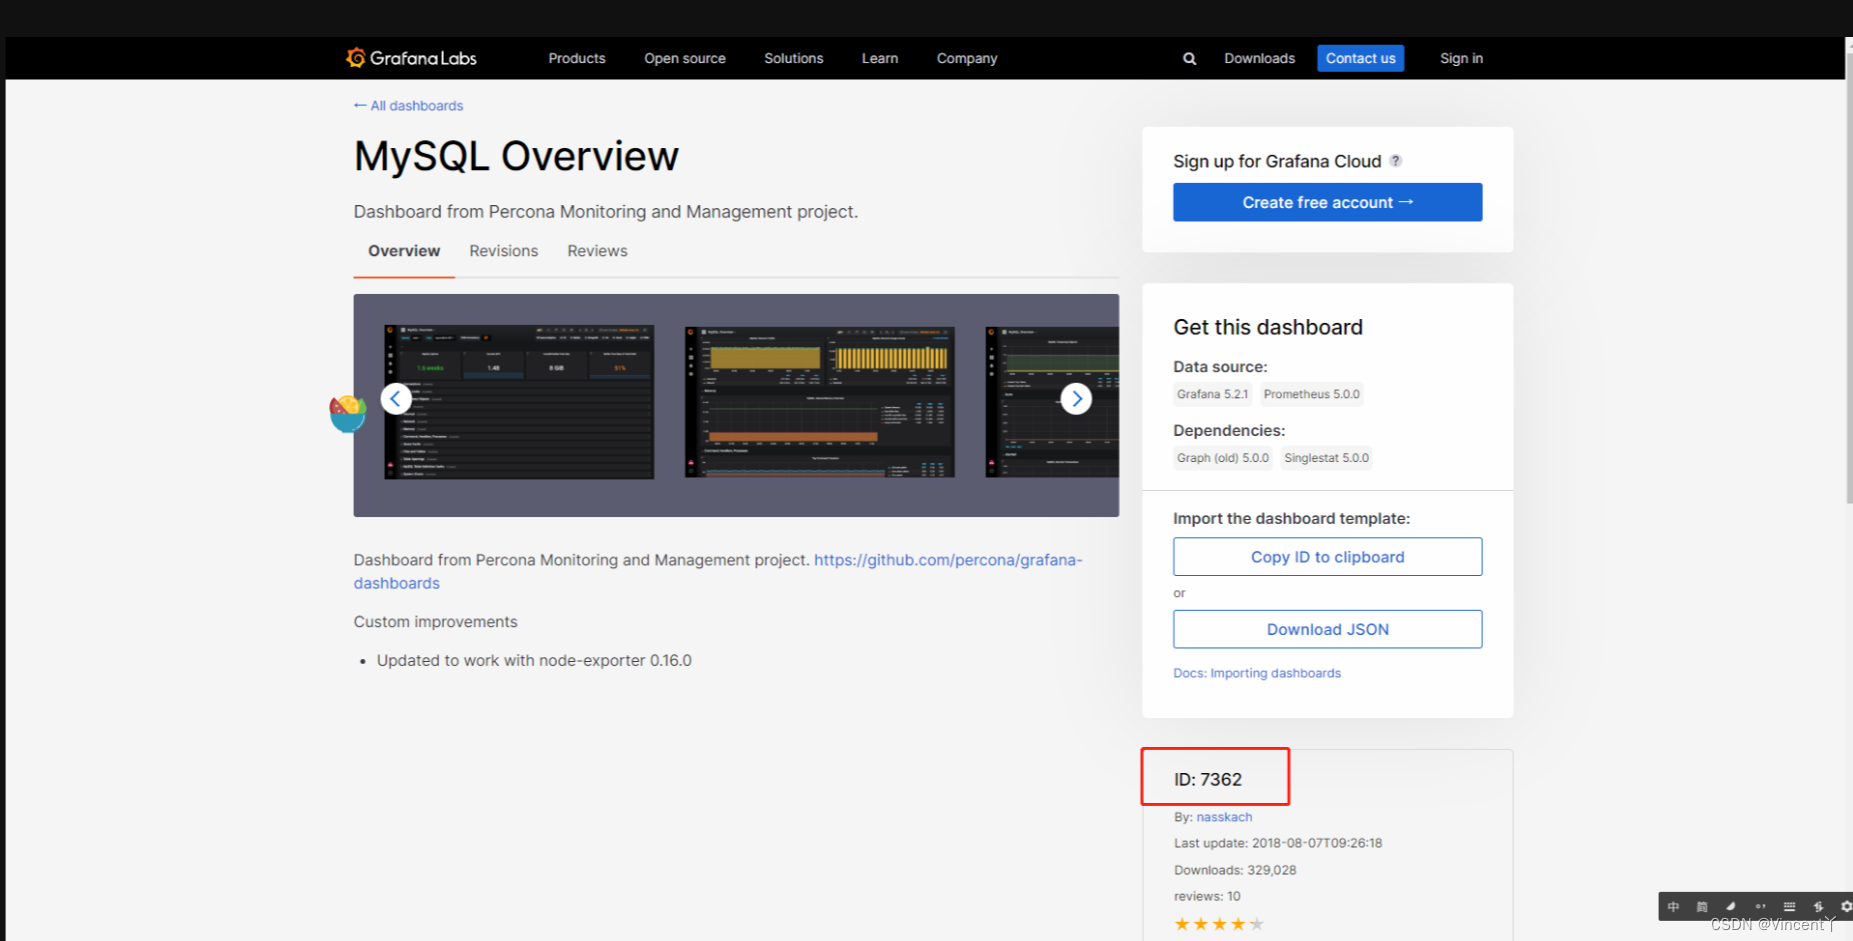
6、生成模板,模板官网Dashboards | Grafana Labs
找到mysql的模板id,自动生成
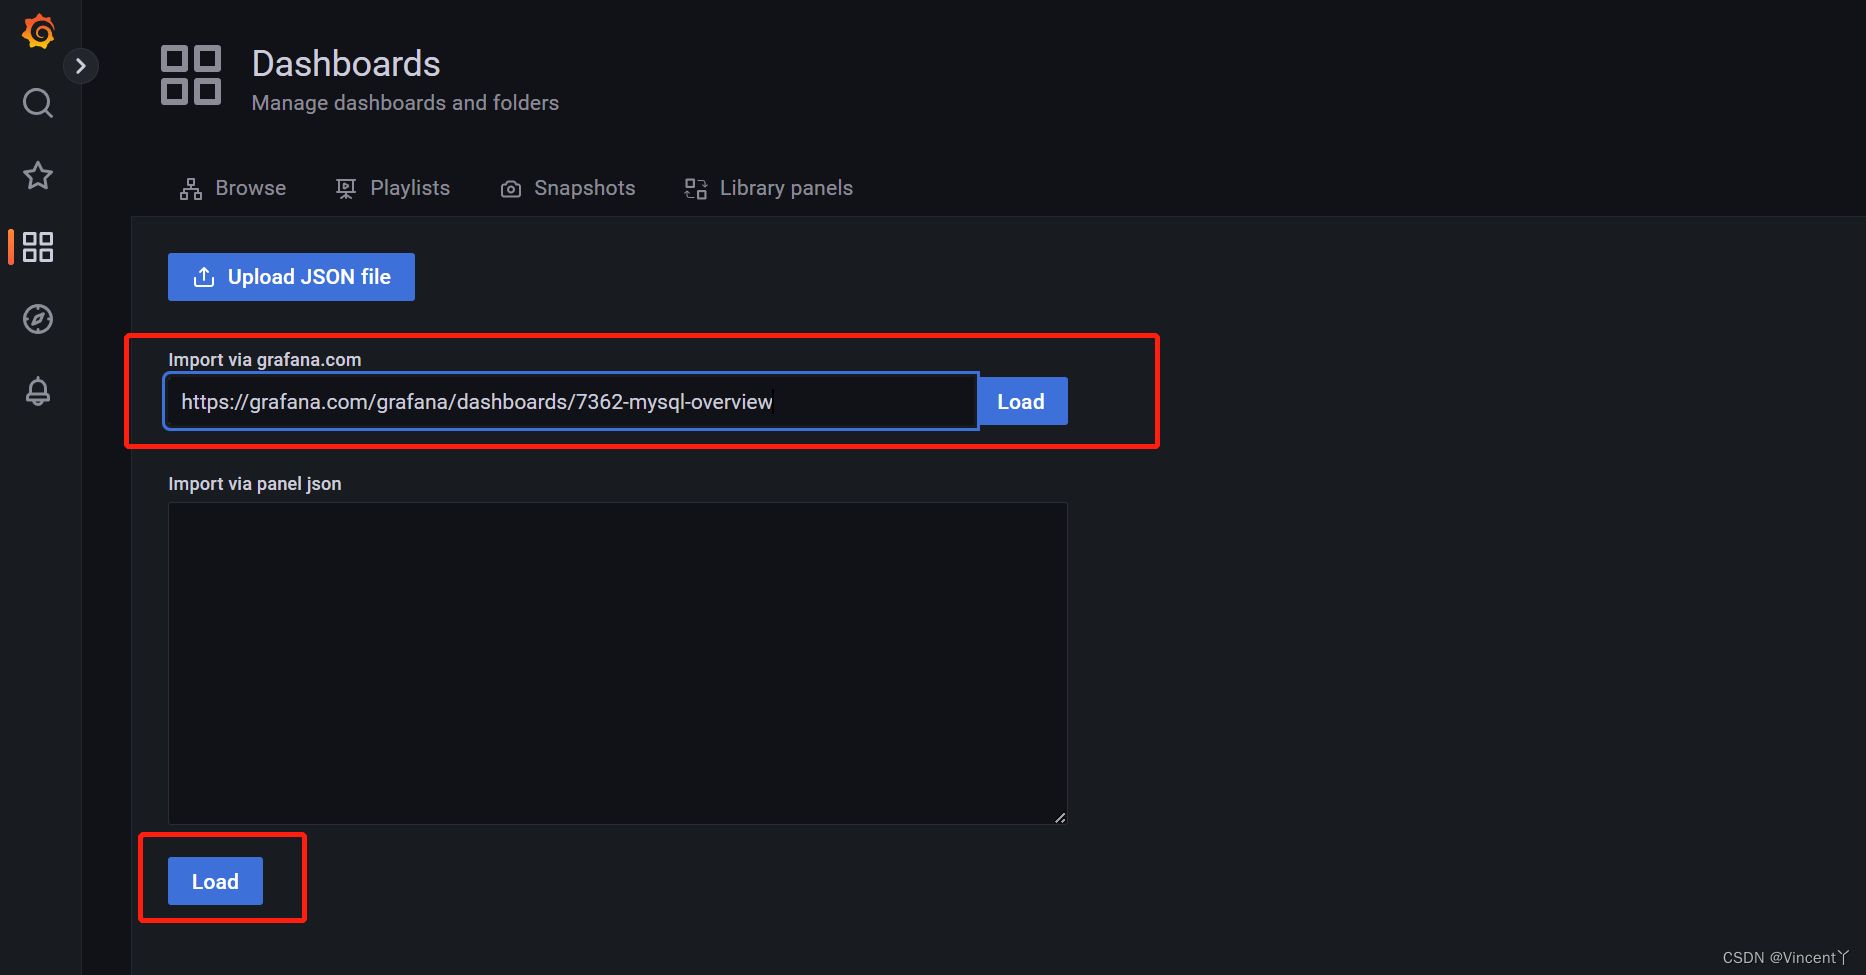
7、加载生成的模板链接
链接: https://grafana.com/grafana/dashboards/7362-mysql-overview
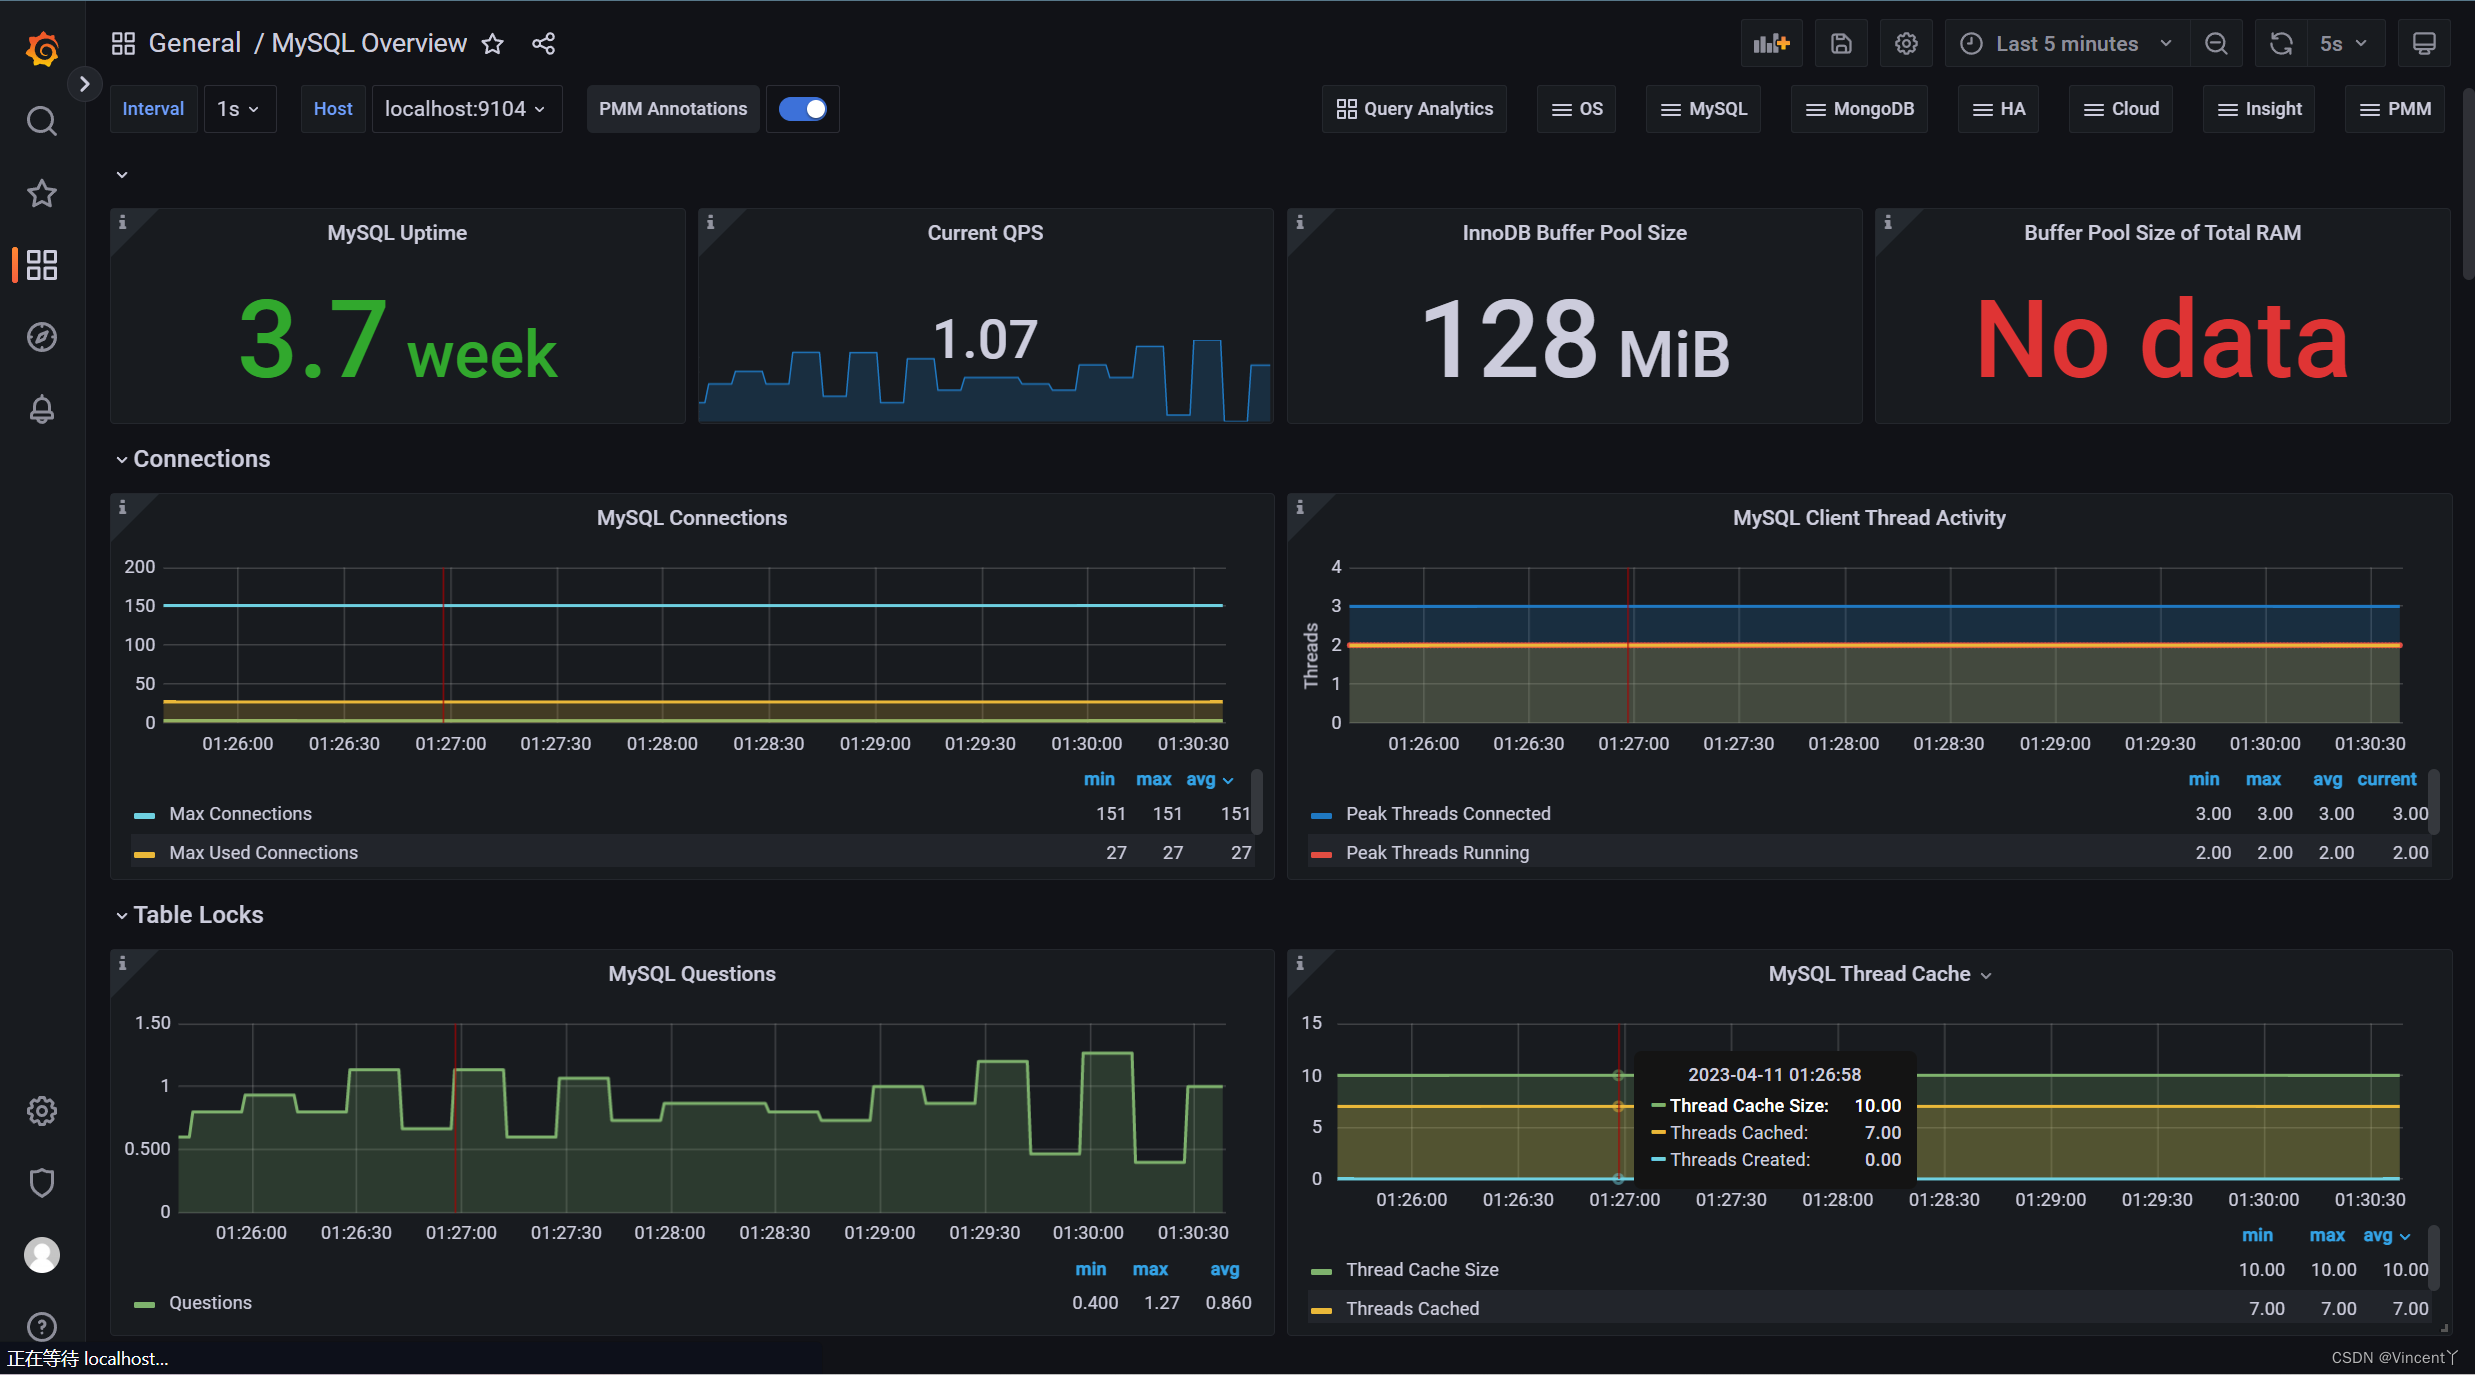
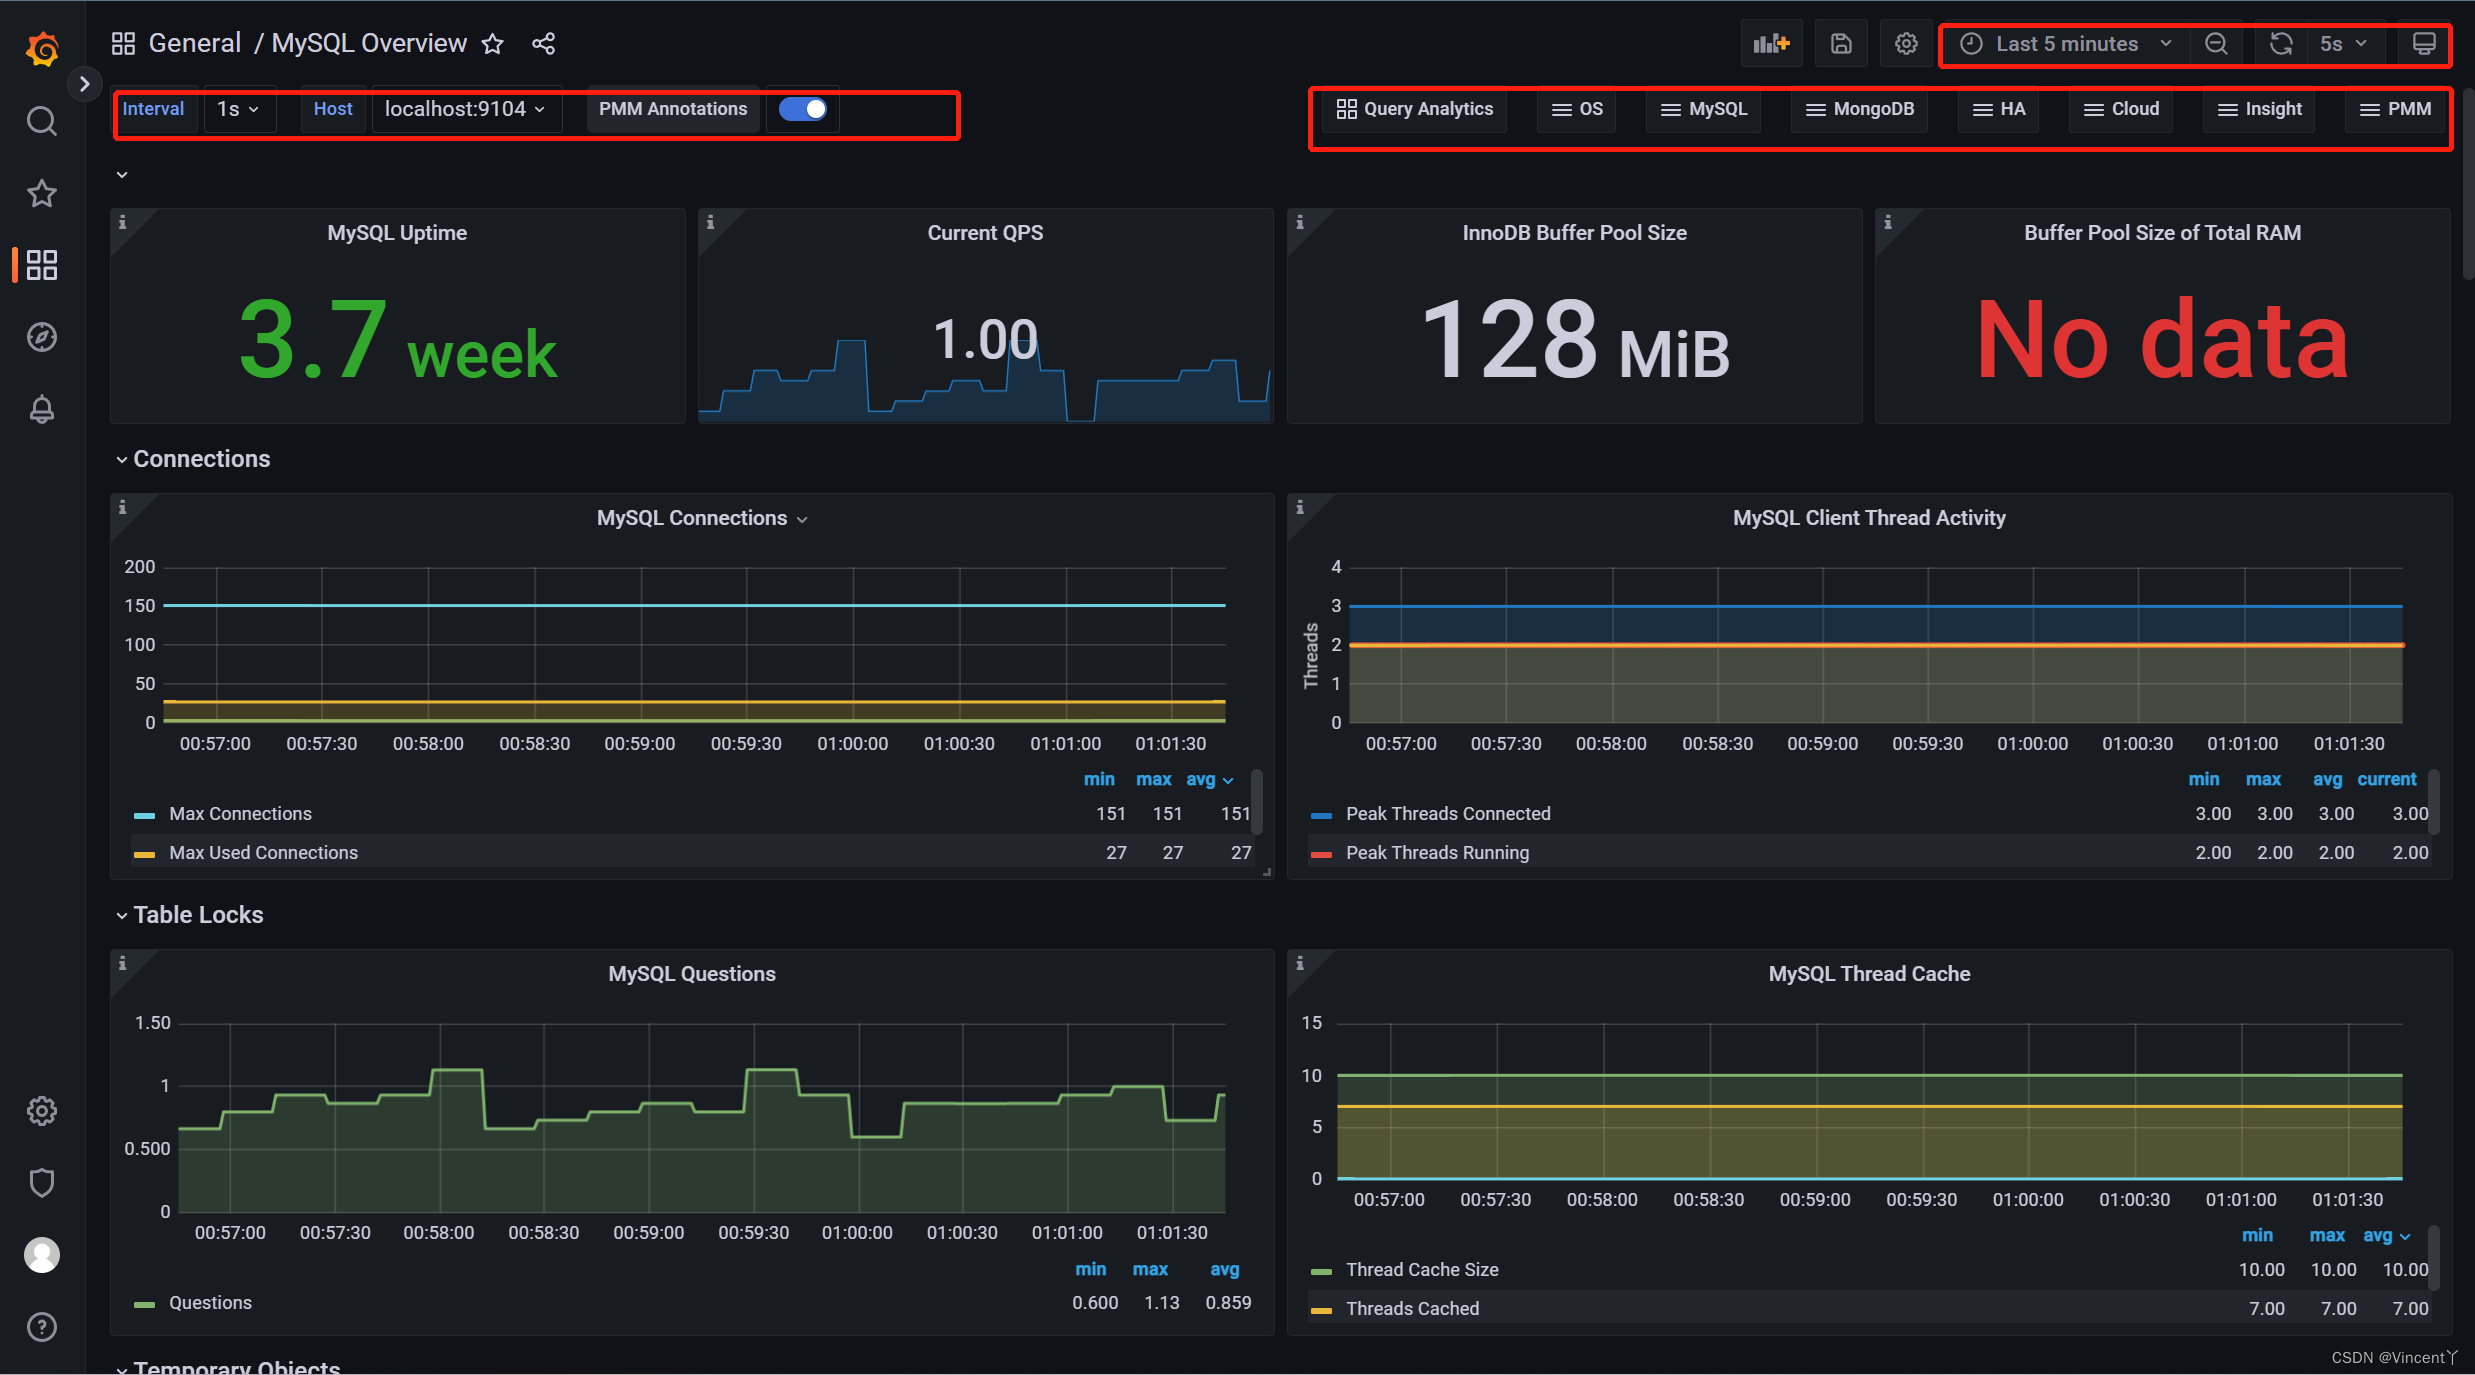
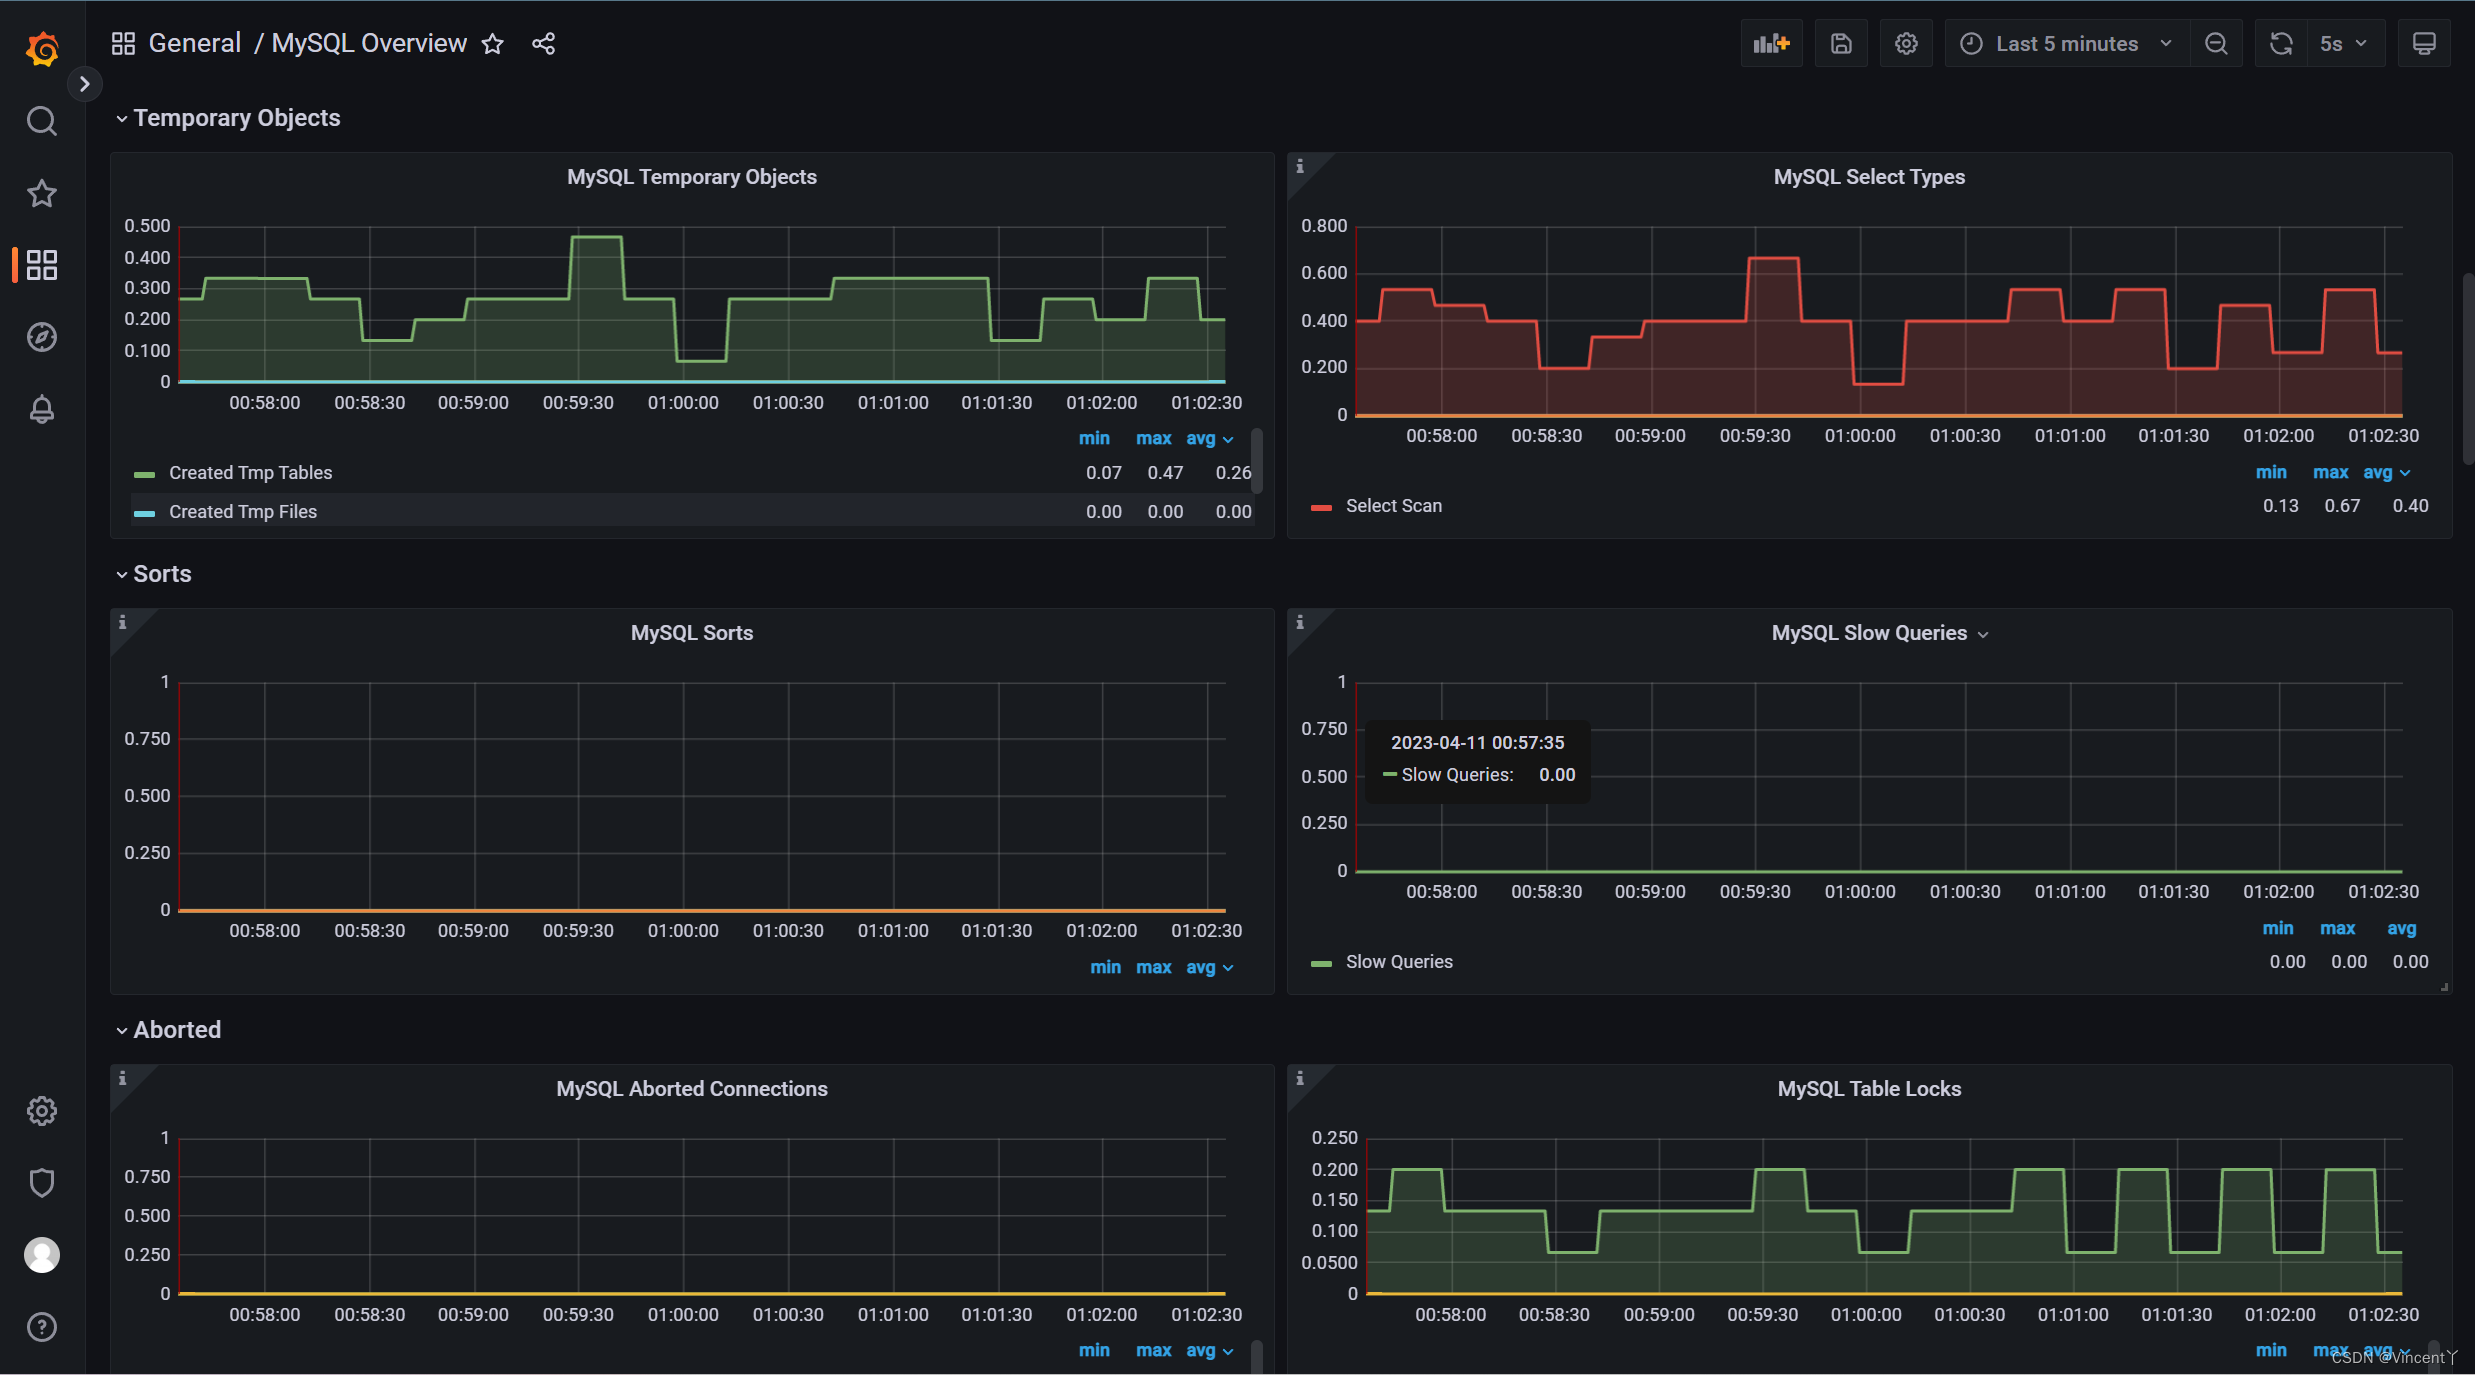
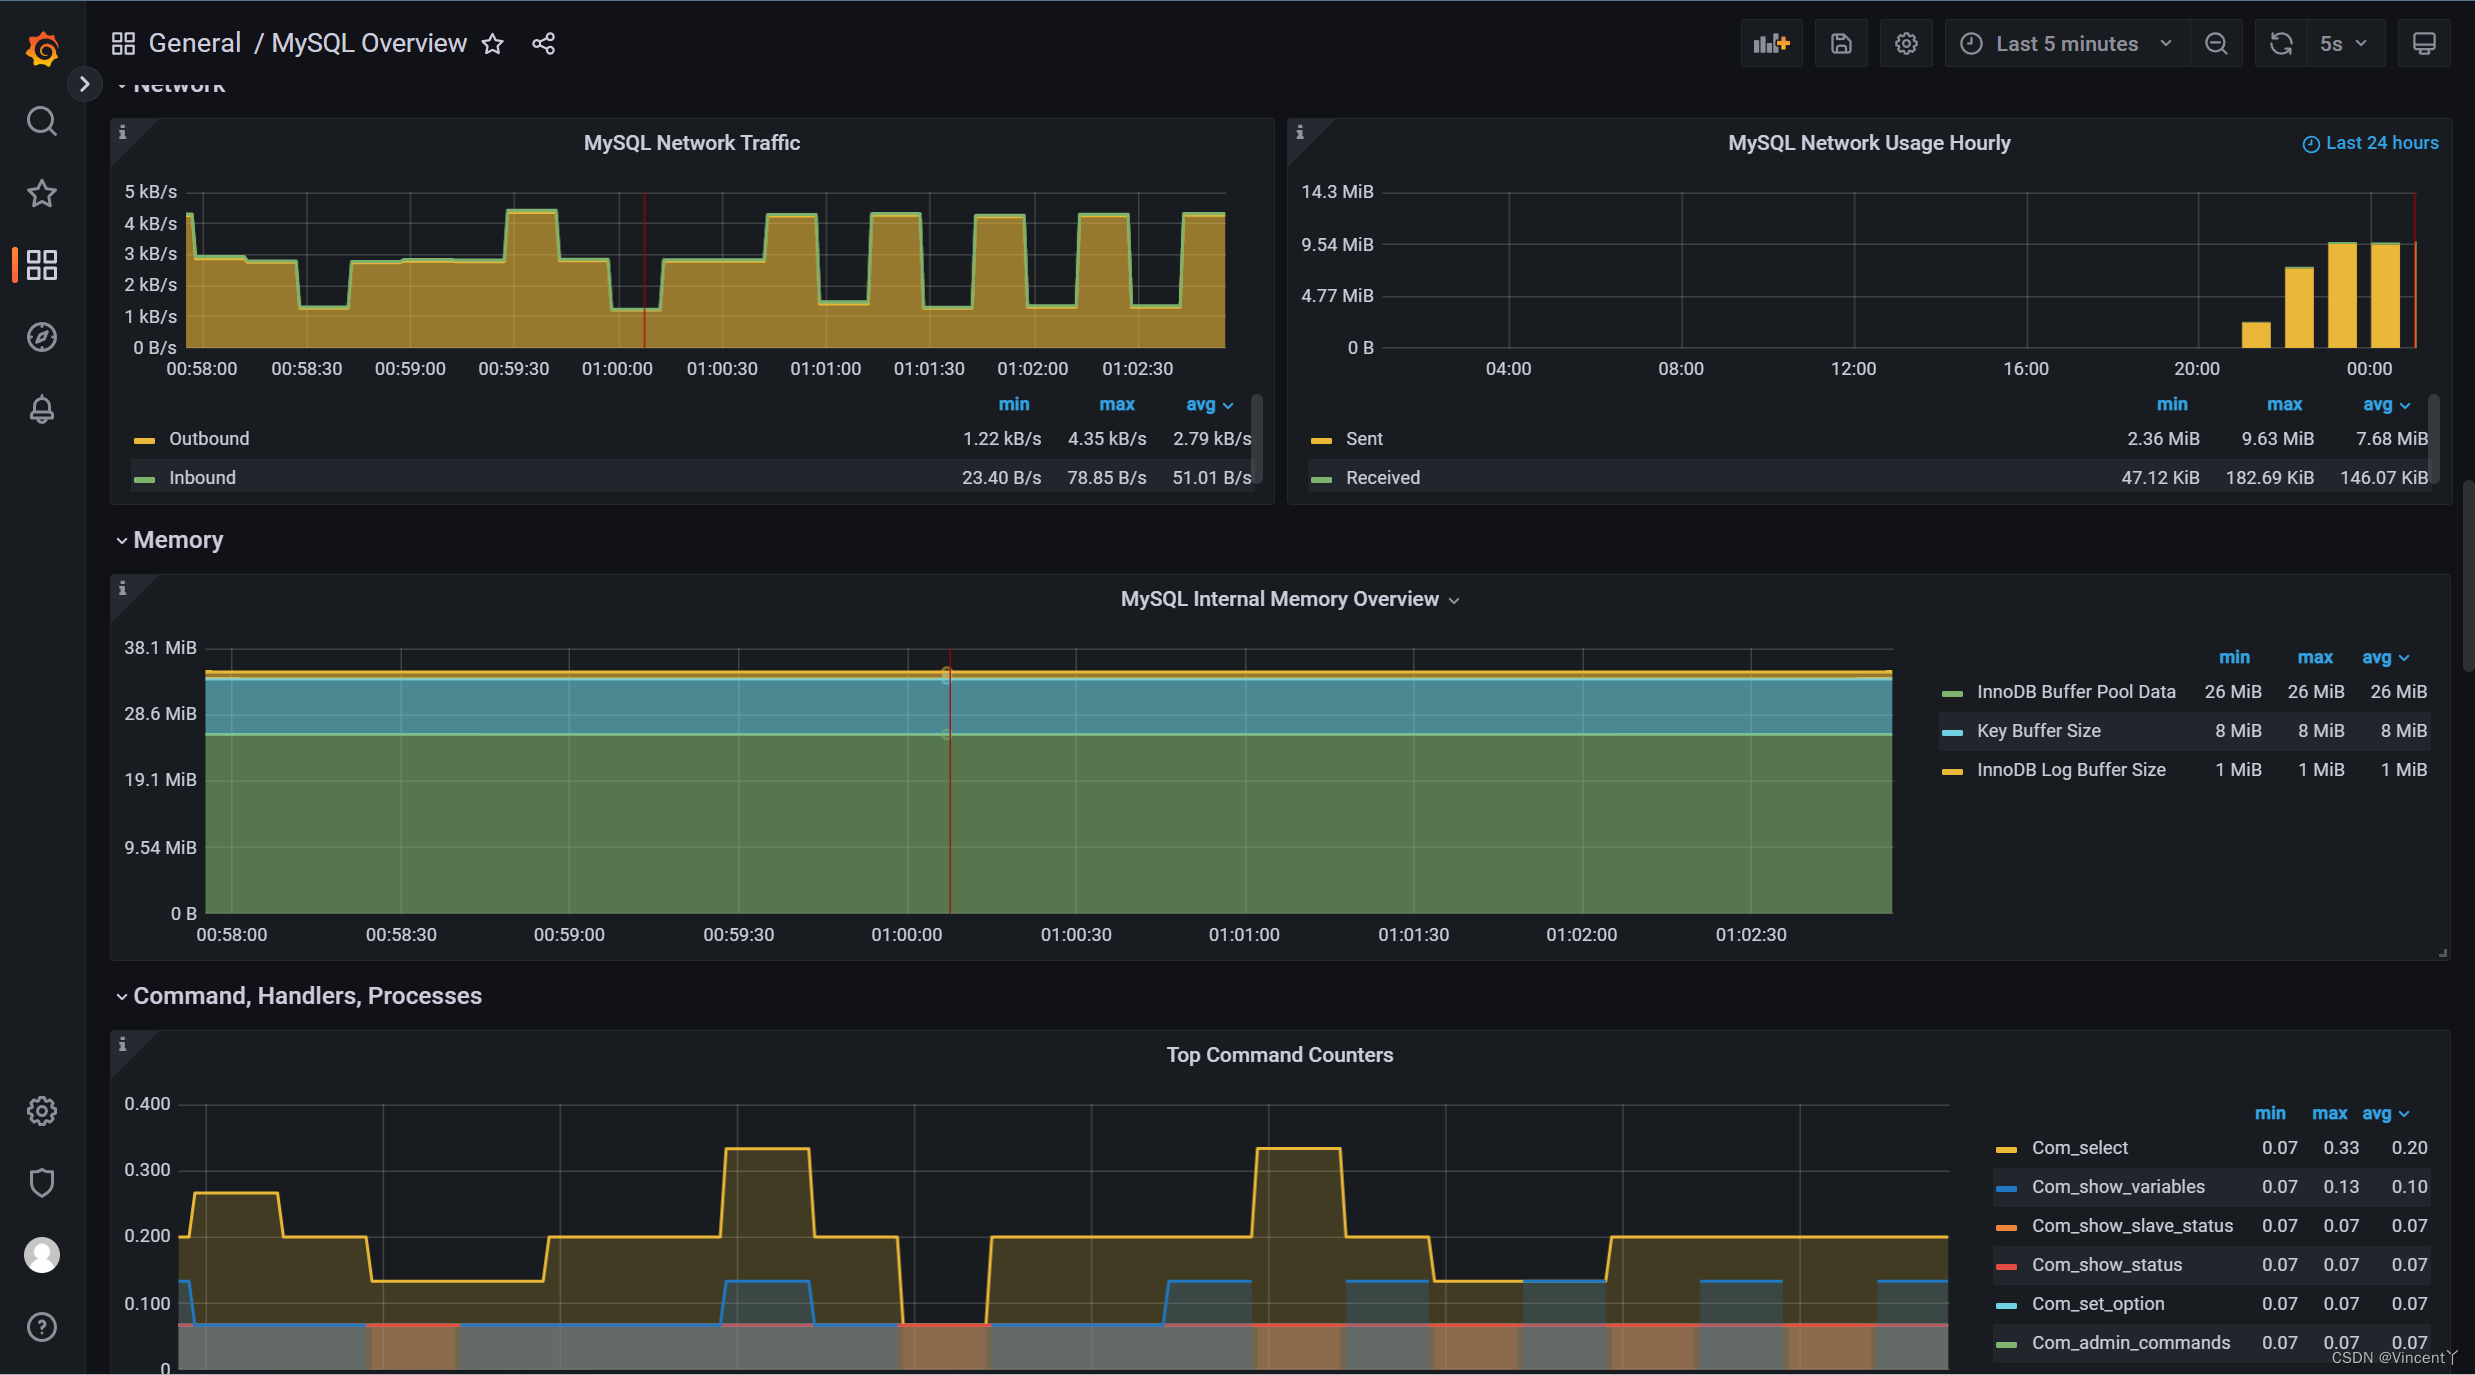
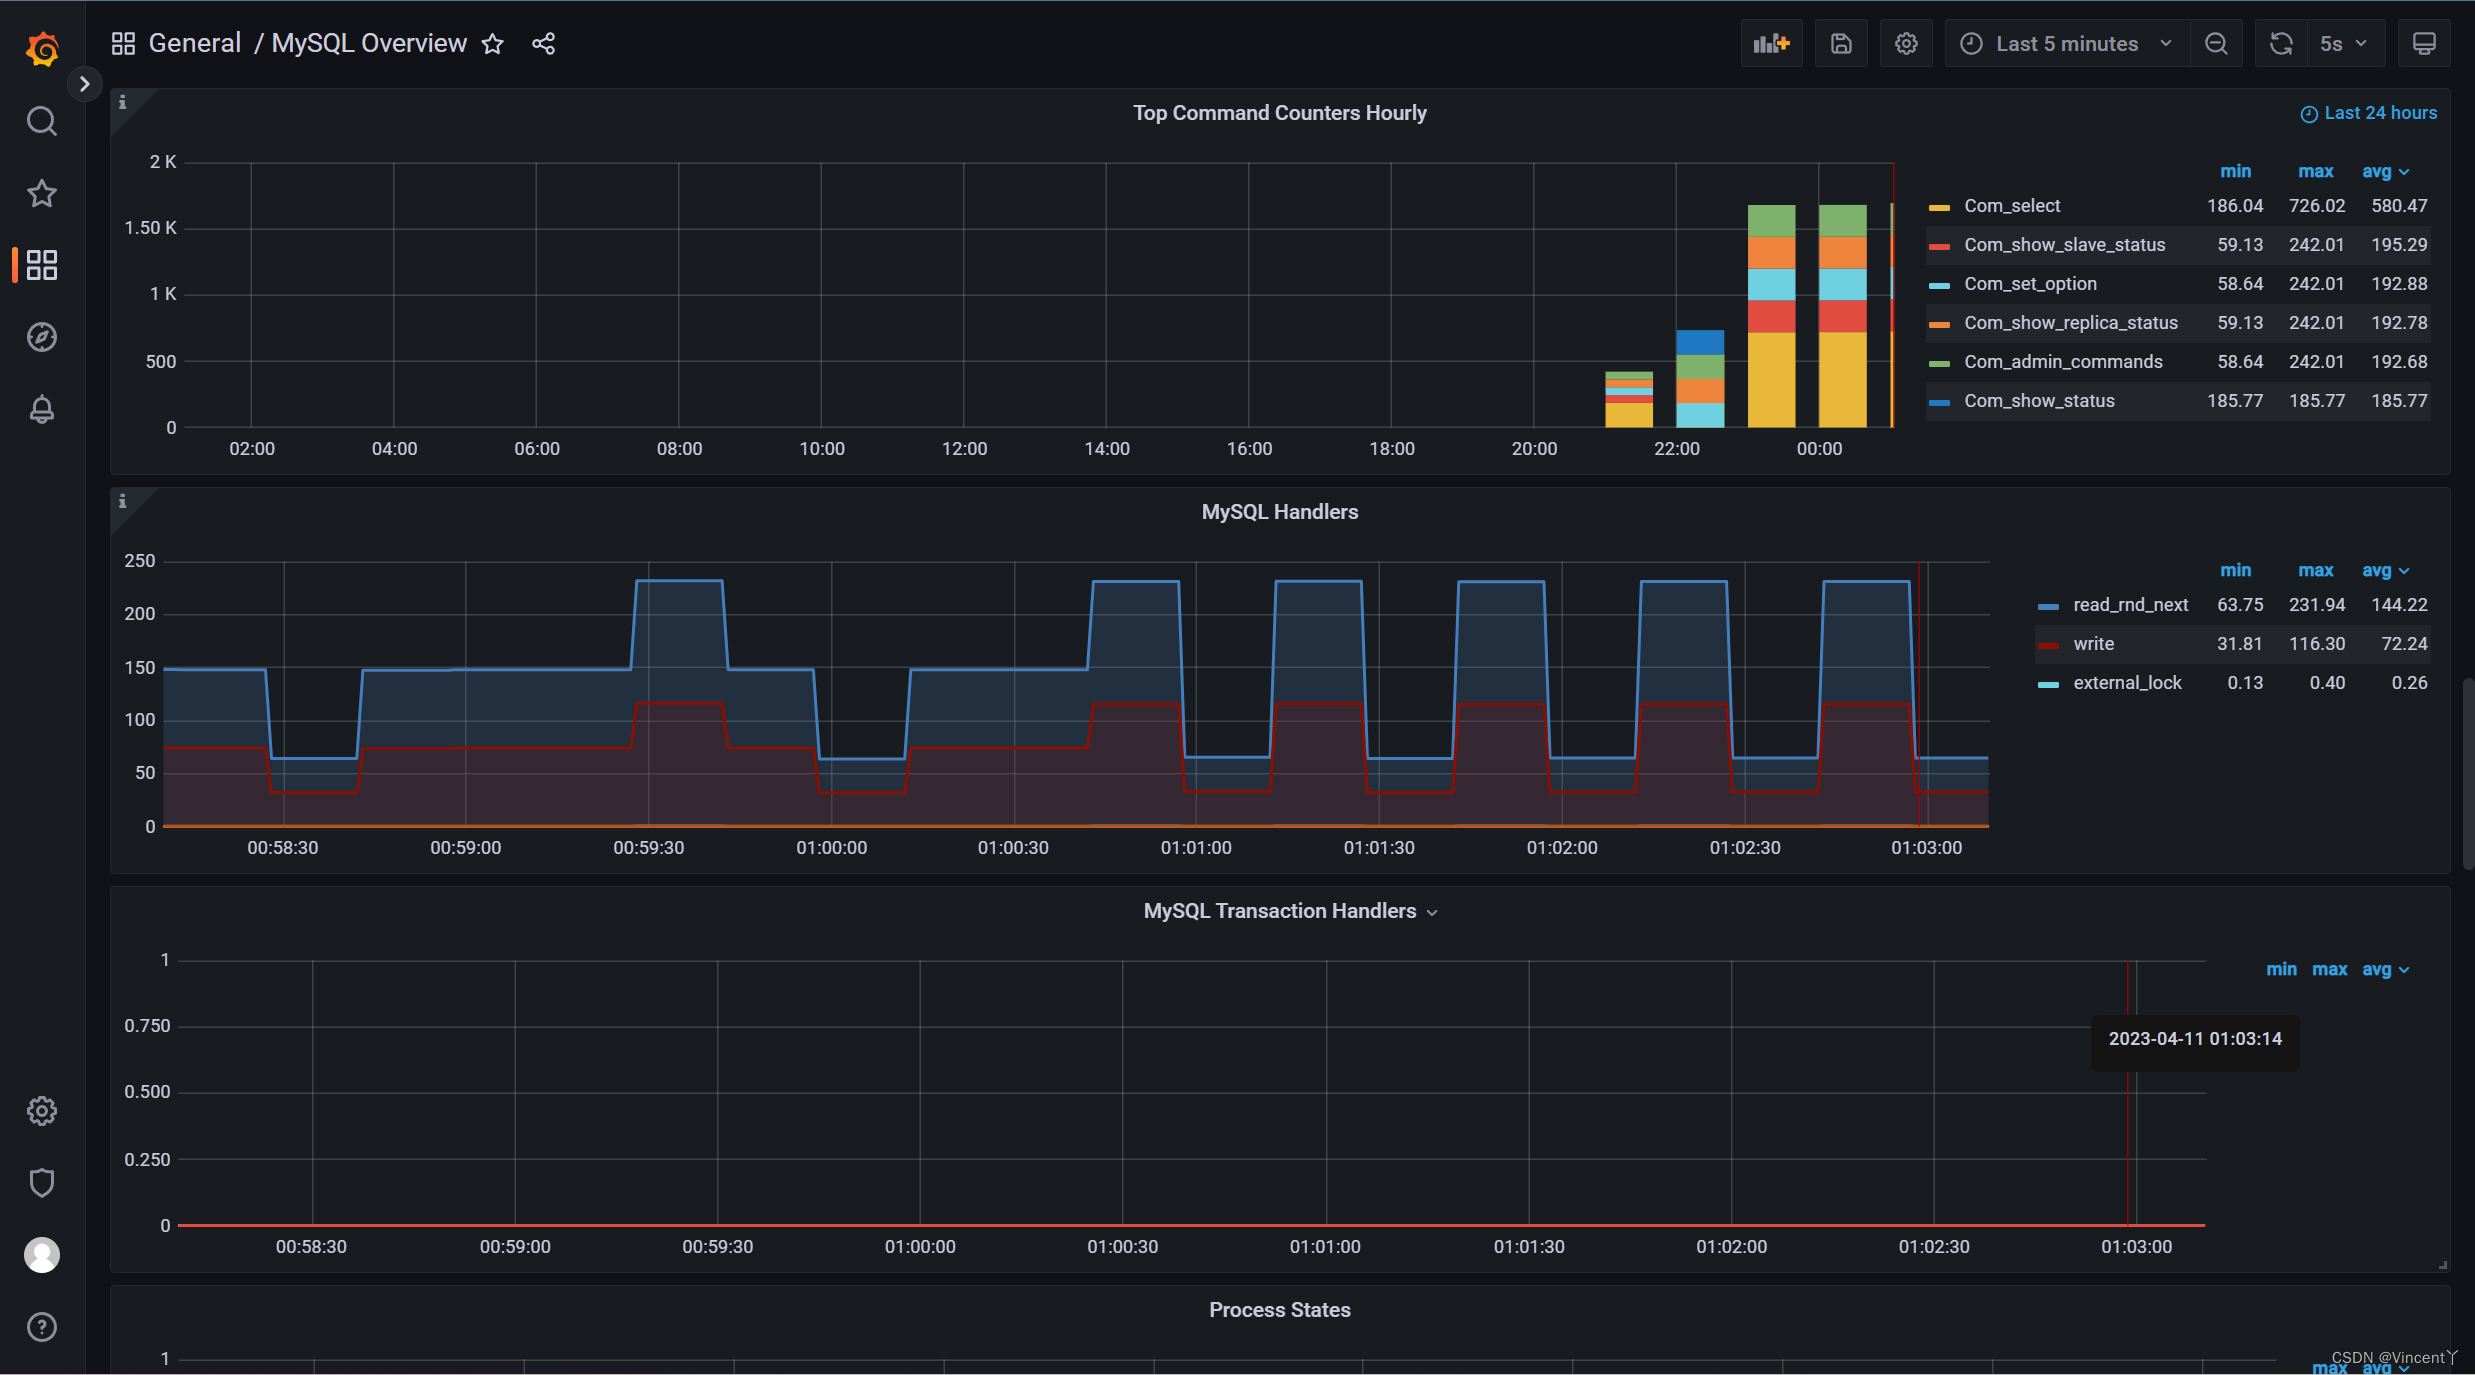
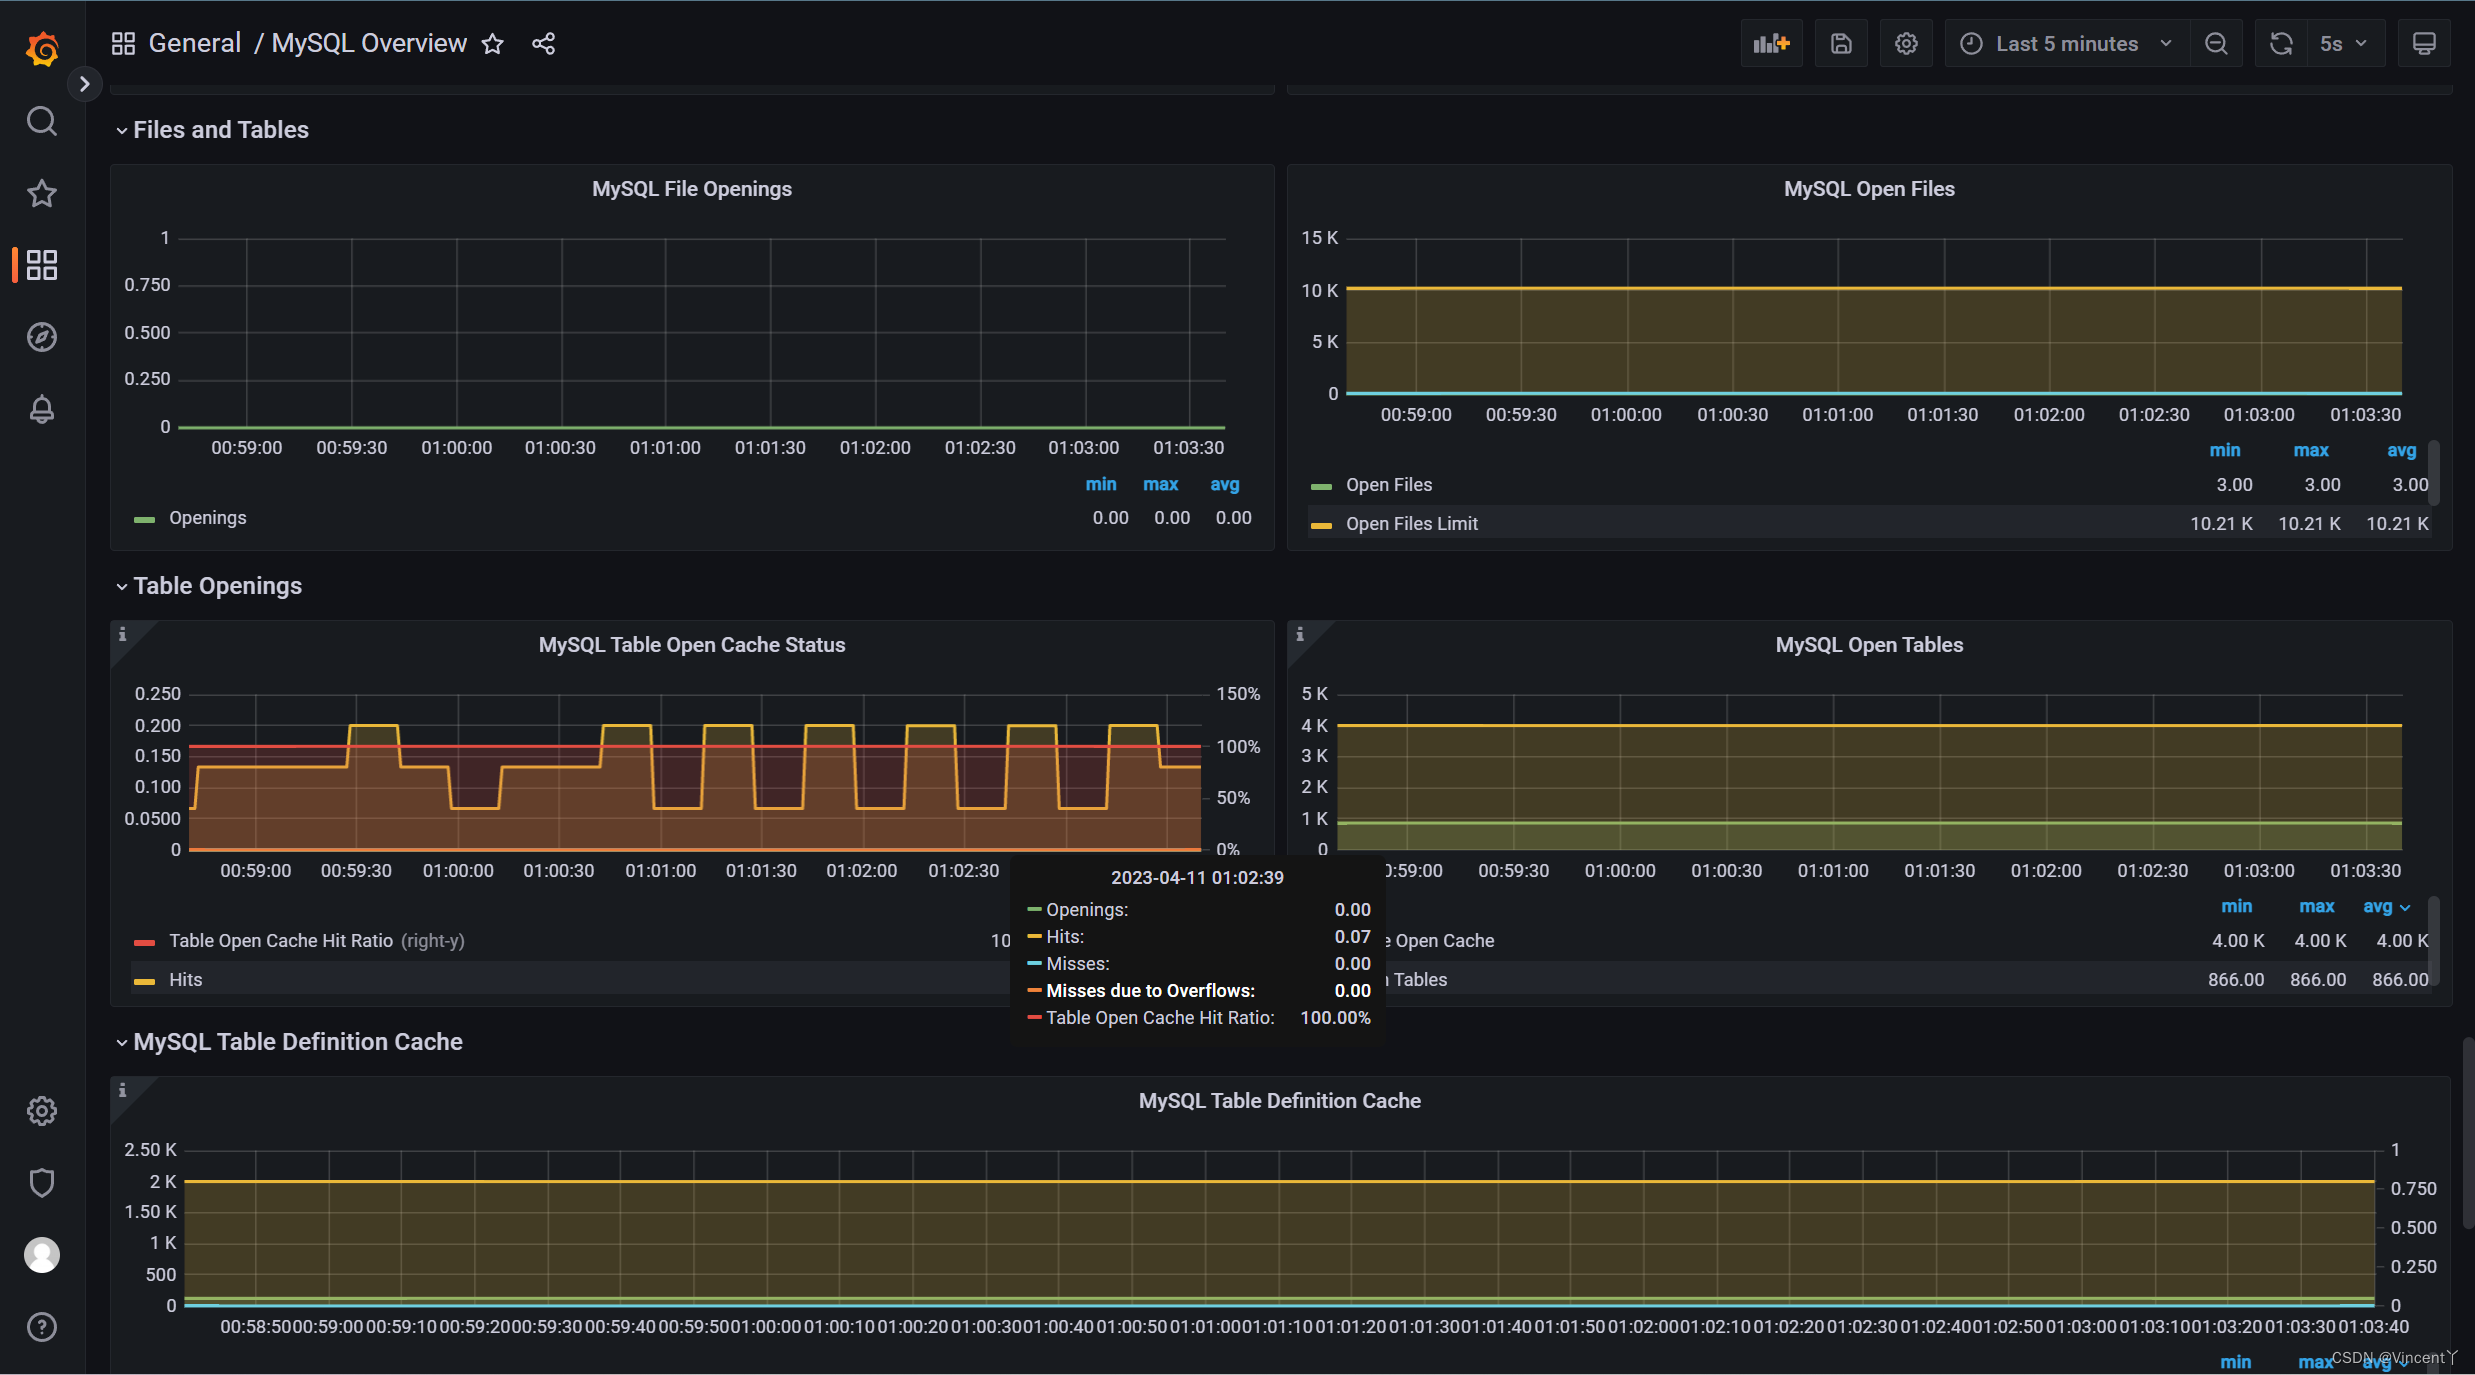
8、prometheus的Dashboards监控数据可视化展示
五、运行Prometheus + Granafa步骤总结
1、设置prometheus的prometheus文件yml
scrape_configs:
# The job name is added as a label `job=
` to any timeseries scraped from this config. #Mysql服务器监控
- job_name: "mysql"
# metrics_path defaults to '/metrics'
# scheme defaults to 'http'.
static_configs:
- targets: ["localhost:9104"] #ip地址+端口
2、双击启动prometheus.exe;
3、创建mysql数据采集器my.cnf文件并配置:
[client]
# mysql用户名
user=root
#mysql的密码
password=root
#主机地址
host=localhost
# mysql端口号
prot=3306
4、cmd进入到mysql数据采集器安装目录执行:
mysqld_exporter.exe --config.my-cnf=my.cnf
5、访问prometheus,ip:9000端口 ,设置Status为Targets
6、访问Granafa, 浏览器访问:http://localhost:3000
7、进行Granafa的Dashboards设置
至此mysql数据监控环境搭建完成!感兴趣的铁汁们也去试试吧!


